
Protect UK Awnings From Mould Without Stripping the Waterproof Coating

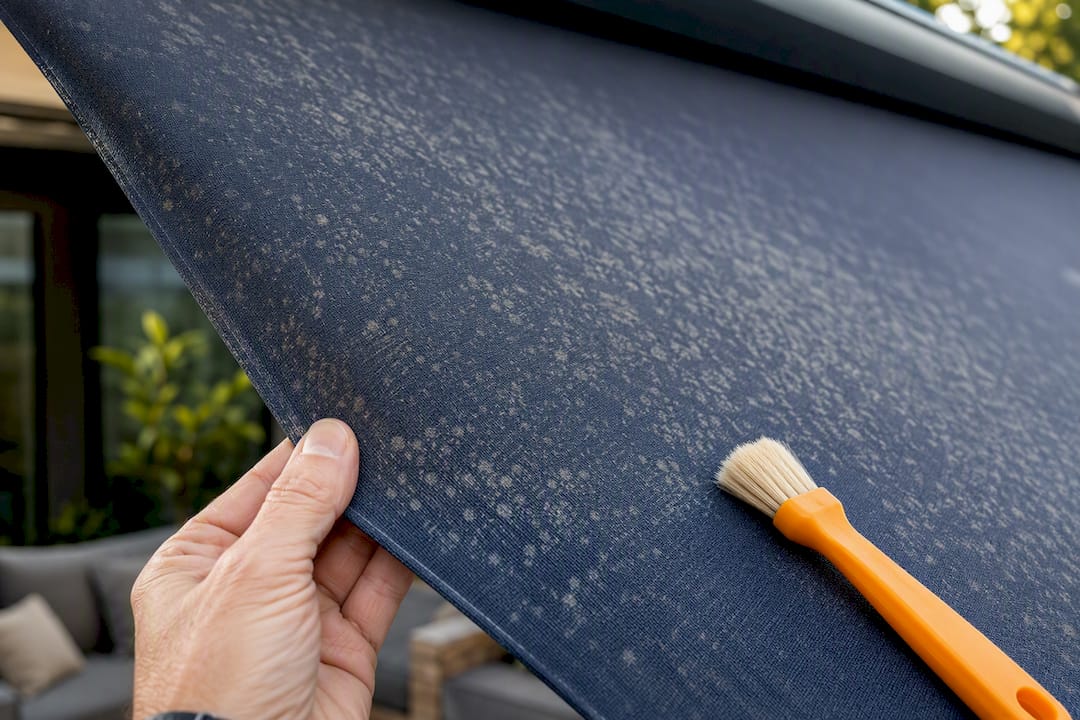
Yes, most surface mould on awning fabric can be removed if the fabric itself and its waterproof coating are still intact. Start with the gentlest option that works: a mild detergent or a diluted vinegar solution, applied with a soft brush after a test patch on a hidden area. If staining stays put after cleaning, or the fabric feels brittle or thin, you’re looking at professional repair or replacement rather than another scrub.
TL;DR:
Using vinegar diluted at 1 part vinegar to 4 parts water or a mild detergent is effective for cleaning surface mould without damaging coated fabrics.
Always dry the fabric completely in open air before retraction and store in a breathable, dry space to prevent mould recurrence.
Avoid pressure washers and strong bleach, as they can strip waterproof coatings and weaken the fabric, making cleaning safer and more effective.
Reproof the fabric regularly if water no longer beads and check seams for damage, replacing the fabric if mould has penetrated or the material deteriorates.
Consistent maintenance, including monthly rinses and twice-yearly deep cleans, helps prevent mould from re-establishing, especially if reproofing and proper storage are maintained.
Table of Contents
What causes awning fabric mould, and what you’ll need to fix it
Mould needs three things to take hold on awning fabric: moisture, organic debris, and poor airflow. Retracting an awning while it’s still damp is the single biggest culprit, because the fabric sits folded in the cassette with no air movement for days or weeks. Add in pollen, leaf litter, and bird droppings caught in the weave, and you’ve got a feeding ground for mildew spores that spreads fast once established.
Before you touch a brush to the fabric, gather the right kit. Using the wrong cleaner is how a mould problem turns into a coating problem.
Cleaners: a white vinegar solution diluted 1 part vinegar to 4 parts water, a mild detergent, or a specialist awning cleaner designed for coated fabrics
Tools: a soft-bristle brush, a spray bottle, a garden hose fitted with a gentle spray head, and microfibre cloths for wiping down frames
Protection: nitrile gloves, a simple dust mask (mould spores irritate the airways), and eye protection if you’re working overhead
Prep: check the manufacturer’s care label first, then test any solution on a small hidden patch and wait 10 minutes to check for discolouration or bubbling
Pick a dry, mild day, and extend the awning fully so you can secure the arms before you start
The step-by-step way to clean awning fabric mould
Work through this in order rather than jumping straight to scrubbing. Rushing the early steps is what leaves streaks and spreads spores across clean sections.
Dry-brush first. Sweep loose debris, dried leaves, and surface dust off the fabric with a soft brush before any water touches it. This stops you grinding grit into the weave and cuts down on airborne spores.
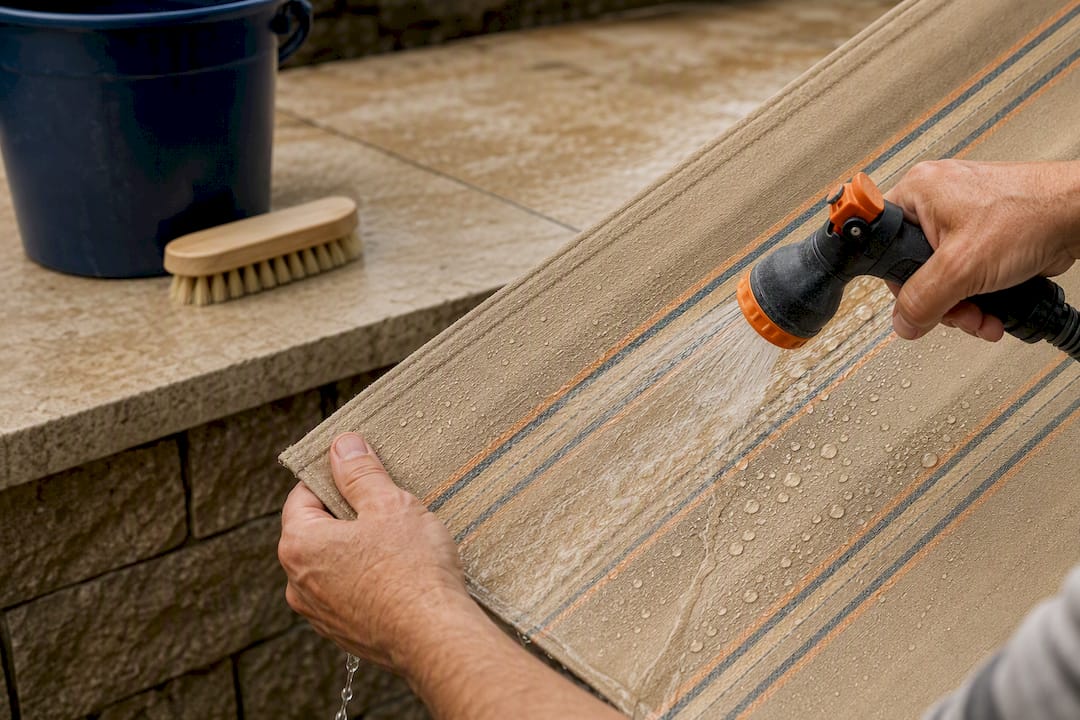
Rinse the whole panel. Use a gentle hose setting to lift loose dirt and soften any mould before you apply anything stronger. Skip this and your cleaner has to fight through a layer of dirt as well as mildew.
Apply your solution. Spray the vinegar mix or mild detergent evenly and leave it to dwell for 10 to 15 minutes. Don’t let it dry on the fabric in direct sun. That’s what causes patchy discolouration.
Scrub gently, in circles. Work small circular motions with the soft brush, paying particular attention to seams, stitching, and the valance edge, where mould tends to cluster because airflow is worse there.
Rinse thoroughly. Keep hosing until no suds or residue remain, then step back and inspect the fabric in daylight for any patches you’ve missed.
Repeat on stubborn spots. For marks that won’t lift, spot-treat again with the vinegar solution or a specialist cleaner rather than reaching for something stronger. Persistent black staining that survives two or three attempts usually means the mould has penetrated the fibres rather than sitting on the surface.
Pro Tip: Clean on an overcast, dry day rather than in full sun. Direct heat dries your cleaning solution too fast to work properly, and can bake in streaks that are far harder to shift second time round.
If you notice bubbling in the coating during rinsing, stop immediately. That’s a sign the finish is already compromised and further scrubbing will only strip more of it. Faded patches after cleaning usually mean the fabric’s colour treatment has thinned with age rather than anything you’ve done wrong, though it’s worth noting for future reproofing decisions.
Which cleaners work, and which ones wreck the fabric
The instinct to reach for bleach or a pressure washer is understandable. Neither belongs anywhere near awning fabric. High-pressure jets force water through the weave and strip the hydrophobic coating that keeps the fabric waterproof, while strong bleach breaks down fibres and weakens stitching at the seams, exactly where you can least afford it.
Vinegar and mild detergent do the job for most light to moderate mould without that damage, because they treat the surface rather than degrading it chemically. Hydrogen peroxide is a reasonable step up for tougher patches, though it should still go through a patch test first. Some UK caravan owners use diluted Milton sterilising fluid, never stronger than a 1:10 mix, for stubborn cases, but this needs the same caution and a hidden-area test before wider use.
Avoid pressure washers entirely on fabric awnings
Avoid undiluted or strong bleach
Choose vinegar, mild detergent, or a specialist coated-fabric cleaner
Always patch-test, and stop if you see bubbling, colour change, or fabric thinning
How to dry, reproof and store an awning without inviting mould back
Cleaning solves today’s problem. Drying and storage decide whether mould comes back next month. An awning packed away even slightly damp will grow mould again within weeks, often worse than before, because the fabric sits folded against itself with no ventilation.
Let the fabric dry completely in the open air before retracting it to ensure proper drying as advised in how to winterize your doors. Never wind a damp awning into its cassette
Check whether water still beads on the surface. If it soaks in instead, it’s time to reproof with a product matched to your fabric type
Store in a breathable bag in a dry, ventilated space, never sealed plastic
If you must pack an awning away while slightly damp, unpack and air it as soon as possible thereafter
Reproof regularly, such as annually or when water no longer beads, and inspect seams every time you clean
Should you repair, reproof, or replace the fabric?
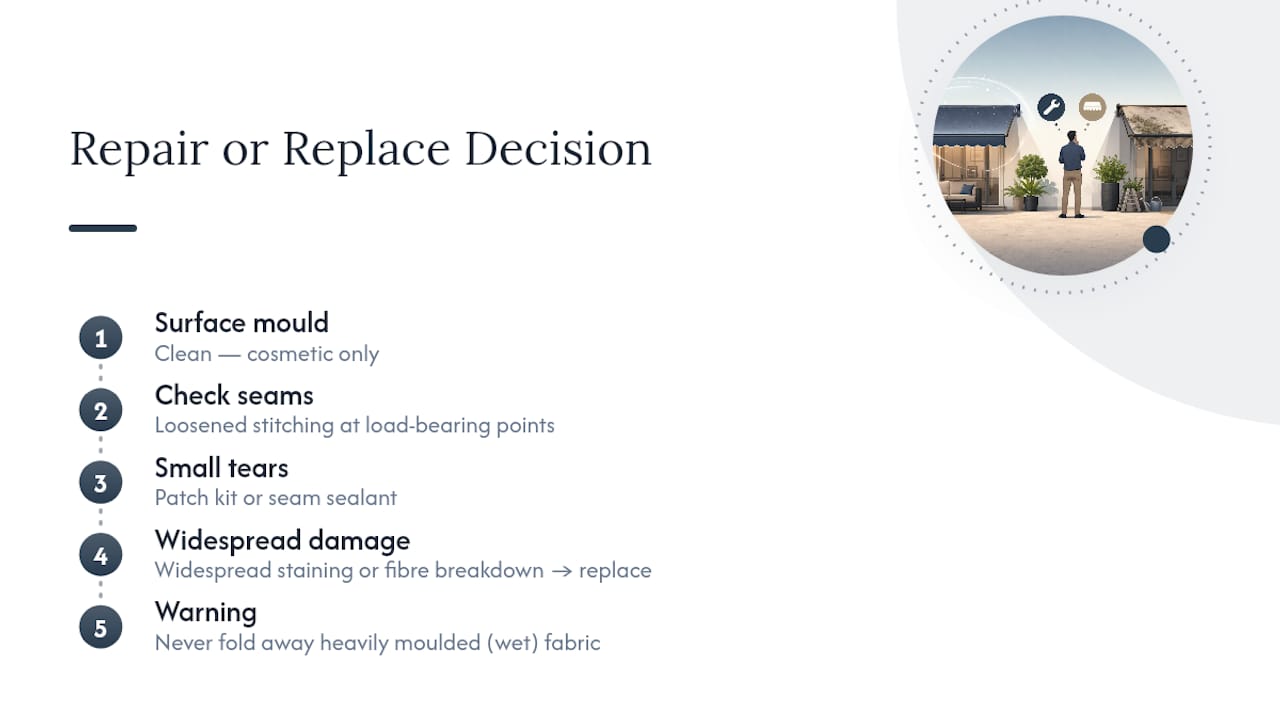
A good clean sorts out surface mould. It won’t fix fraying fibres, stitching that’s pulling away, or a musty smell that lingers after the fabric has dried completely. Those are signs the mould has gone beyond cosmetic and started breaking down the material itself.
Seam damage is the line to watch closely. If stitching has loosened around load-bearing points, the fabric may no longer be safe under wind or tension, even if it looks fine elsewhere. Small tears often take a patch kit or seam sealant. Widespread staining or fibre breakdown generally means replacement is more sensible than repair. Whatever you do, never fold away a heavily moulded awning intending to deal with it later. That guarantees the problem gets worse, not better.
A simple maintenance schedule that actually prevents mould
Consistency beats intensity here. A quick monthly rinse to clear pollen and debris, a proper mid-season deep clean, and a thorough clean before winter storage covers most of what causes recurring mould. Regular brushing and rinsing removes the organic matter that mildew actually feeds on, which matters more than any single deep clean.
Rinse periodically, for example about once every month, to clear pollen, leaves, and dust
Deep clean mid-season and again before storage, twice a year minimum
Check zips, seams, and stitching at every clean
Keep the awning pitched for drainage rather than flat, and let sunlight reach the fabric occasionally
Use desiccant packs in storage and skip airtight plastic bags, which trap the moisture you’re trying to avoid
If you’re replacing fabric rather than cleaning it, solution-dyed acrylics and Hi-Clean-style finishes resist soiling far better than untreated fabric and need less frequent intervention. Once that finish is stripped by harsh cleaning, though, the fabric turns porous and picks up dirt and moisture much faster than before.
What installers know that most guides leave out
Manufacturer cleaning instructions exist for a reason specific to your fabric’s finish, so check them before assuming a generic method applies, and always patch-test regardless of what the label says. Retractable awnings carry an extra risk that fixed canopies don’t: retracting while wet traps moisture inside the cassette where it can’t evaporate, which is often where hidden mould starts.
When we install or service retractable awnings, we tell owners to pitch the arm slightly so water sheds away rather than pooling on the fabric, and to check the cassette seal isn’t letting moisture creep in during storage. Reproofing timing matters too. Once beading fails, waiting makes the fabric absorb water rather than shed it, which accelerates mould growth. For a broader look at seasonal fabric care, our guide to maintaining awnings for lasting outdoor comfort covers the wider maintenance picture beyond mould specifically.
The one thing most people get wrong about awning mould
Most people treat mould as a cleaning problem when it’s really a drying problem. Scrub the fabric all you like. If it goes back into the cassette even slightly damp, the mould returns within weeks, often worse. The fix isn’t a stronger cleaner. It’s patience with the drying stage and honesty about when a fabric’s coating has had enough.
Start small: pick one patch, run a test clean with mild detergent or diluted vinegar, and see how the fabric responds before treating the whole awning. If the mould keeps returning or the fabric feels thin and porous, it’s worth getting a professional inspection rather than guessing. Professional services can assess and service your awning if cleaning alone isn’t cutting it, and if replacement fabric or a new pergola is on the cards, a pergola range is worth a look too.
— Andrew
Sources
Recommended
Comments