
9 pergola lighting ideas for UK gardens that avoid rewiring

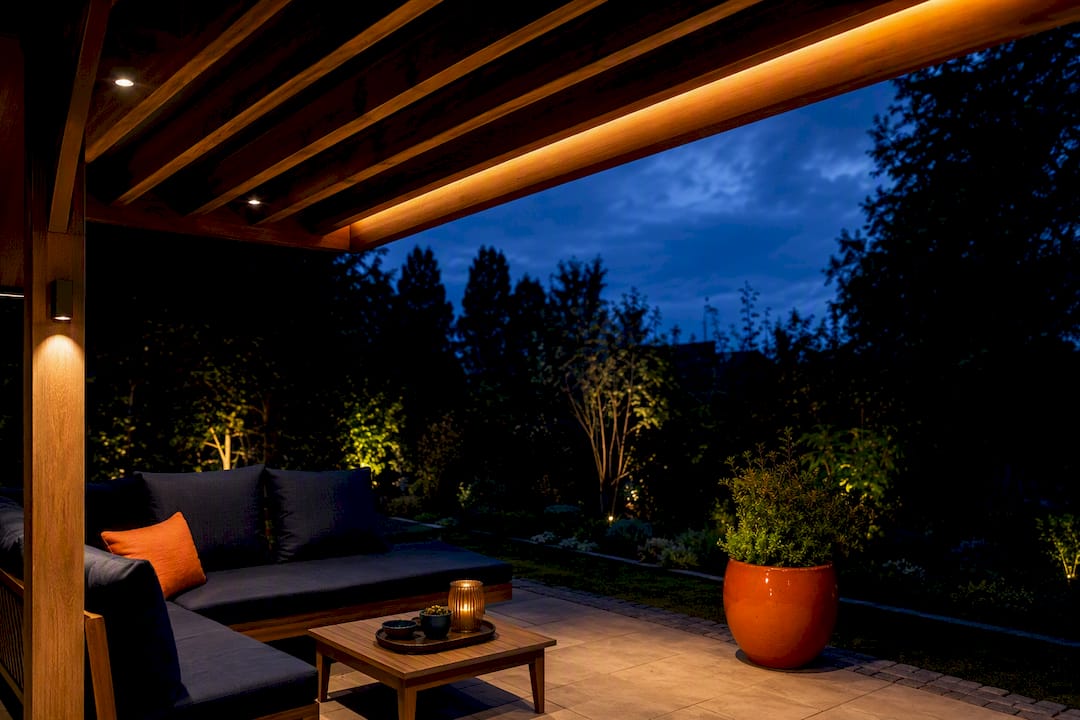
The best pergola lighting scheme layers three types of light: warm festoon or fairy lights for ambience, focused downlights or spotlights for tasks like dining, and discreet uplighting to show off the structure itself. Every fitting needs an appropriate IP rating and RCD protection, since these are outdoor circuits, not extension leads borrowed from the shed. If running cable feels like too much hassle, solar or rechargeable options let you get most of the effect with none of the wiring.
TL;DR:
Proper pergola lighting layers festoon or fairy lights, downlights, and uplighters, with each layer serving a specific ambience or task.
IP ratings must meet the exposure level, with IP65 or higher recommended for most outdoor fittings, especially near water or in unprotected areas.
Using a well-planned power method, such as a protected outdoor circuit or solar options, is crucial for safety and reliable performance.
Professional installation ensures correct cable routing, IP-rated fittings, and certification, preventing common wiring and safety mistakes.
Combining multiple lighting types and carefully selecting fittings improves usability, atmosphere, and durability across different seasons and weather conditions.
Table of Contents
Pergola lighting ideas worth stealing for your own space
Not every idea on this list suits every pergola, and that’s the point. A slatted timber structure with plenty of overhead beams handles festoons and pendants easily; a slimline aluminium frame might only have room for LED strips tucked into the box gutter.
Festoon lights strung across the beams. Space bulbs 15 to 30 centimetres apart along the cable and use vintage-style E27 or E14 warm LED bulbs rather than clear filament versions, which throw a colder light. Anchor each end to a stainless eye screw fixed into a structural beam, not the fabric or lattice, and let the run sag slightly rather than pulling it taut. This is the fixture most people picture first, and it’s popular for good reason: festoons, pendants and downlights all appear repeatedly in lighting design guidance from Ideal Home as the backbone of a good pergola scheme.
Copper-wire fairy lights for softer detail. These flexible strands wrap around individual beams or lattice panels and come in battery, USB, or solar variants. Battery packs require periodic replacement with regular evening use; solar versions save the hassle but depend on decent daylight reaching the panel.
Integrated LED strips for dining zones. Recessed into a routed channel along the beam edge, these give a clean wash of light without visible fittings. Lighting specialists suggest zoning a pergola so dining areas get functional downlighting while lounge corners keep softer accent light, and a strip above the table does exactly that.
Recessed downlights over the table. Small IP-rated downlights set into the roof beams or a slatted canopy give focused task light for cooking, reading a menu, or clearing plates without flooding the whole space.
A statement pendant as the centrepiece. One bold fitting hung low over a dining table or a pair of armchairs turns a functional structure into something that looks designed, not improvised.
Spotlights or uplighters on the posts. Angled up the corner posts or into climbing plants, these add depth after dark and make the pergola read as architecture rather than a dark shape against the fence.
Freestanding lanterns and floor lamps. These need no fixing at all and can move with the furniture, which suits anyone who rearranges the space through the season.
Solar or rechargeable lanterns for instant flexibility. Panel-topped lanterns and USB-charged options are genuinely useful where running a cable is impractical, though realistic runtime depends on where the panel sits and how much winter light it gets.
Warm white over RGB, almost always. Colour-changing strips look fun in the showroom but tire quickly in daily use; stick to warm tones (2700 to 3000K) for anything you’ll switch on every evening.
Pro Tip: Mix at least two of these categories rather than relying on one. A festoon run alone leaves the table too dim to eat by comfortably; a downlight alone kills the atmosphere the moment the sun goes down.
How to hang and power pergola lights without making a mess of it
Work through this in order and you avoid the classic mistake of buying lights before working out how they’ll get power.
Plan the layout first. Sketch where the dining zone, lounge zone, and any path or step need light, then decide which fixture suits each.
Choose your fixings. Stainless steel eye hooks and turnbuckles suit festoon runs; a tensioned wire kit spans longer distances without sagging; adhesive cable clips work for lightweight LED strips but shouldn’t carry any real load.
Route the cable. New-build pergolas can have channels routed into the beams during construction, which professional installers favour for keeping cable completely hidden. Retrofits need weatherproof conduit or trunking colour-matched to the timber or aluminium finish.
Pick a power method. Mains supply through an RCD-protected outdoor circuit suits permanent LED strips and downlights. A SELV transformer stepping down to 12V is safer to install yourself and forgiving of minor errors, though long runs suffer voltage drop and may need heavier cable or a second transformer to keep brightness even at the far end. Solar or battery avoids wiring altogether.
Test before you fix anything permanently. Run the lights for an evening with temporary clips before committing to permanent fixings, so you can adjust spacing once you see it in the dark.
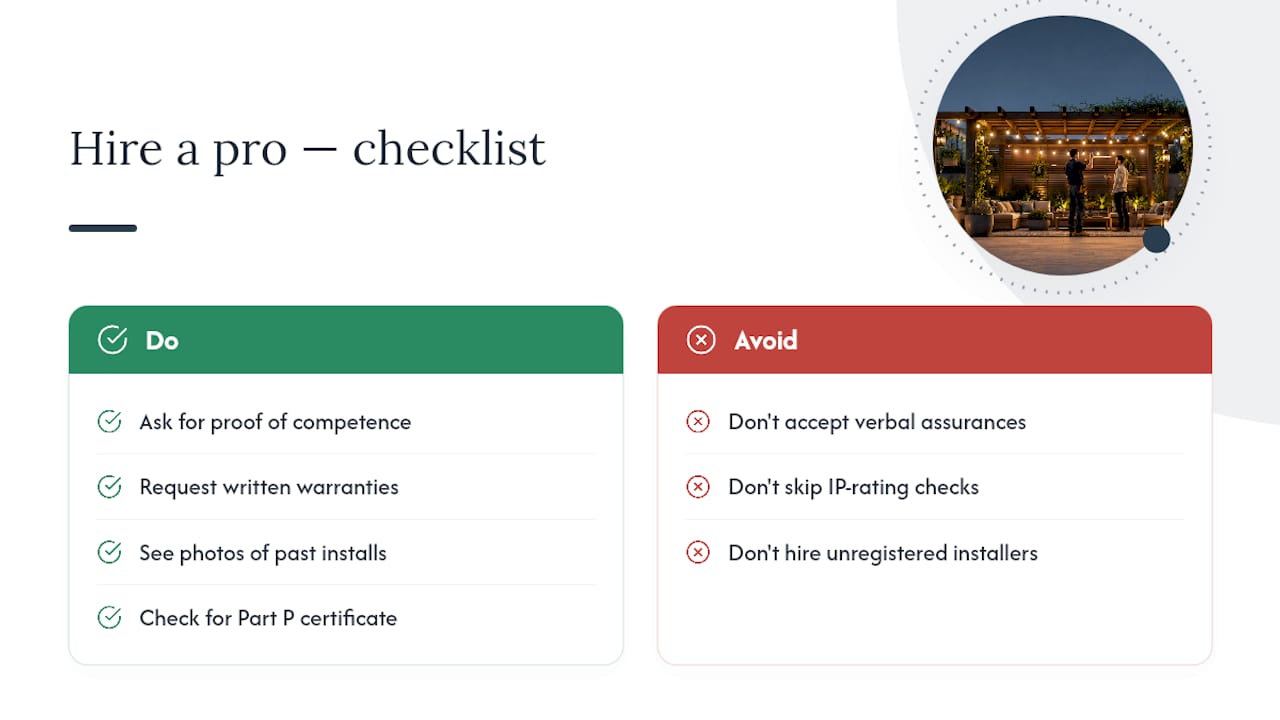
Anything beyond a SELV transformer or a solar kit plugged into an existing outdoor socket should go to a registered electrician. Ask for a Part P completion certificate and confirmation they’re NICEIC or NAPIT registered before work starts.
Pro Tip: If you’re retrofitting lights onto an existing pergola, measure the beam depth before buying LED strips. Shallow beams often can’t take a routed channel without weakening the timber, so surface-mounted strip with a matching trim cover is usually the safer route.
Choosing fittings, bulbs and IP ratings that survive a British winter
Get the rating wrong and you’ll be replacing fittings within a season, so it’s worth five minutes of label-reading before you buy anything.
IP44 is the floor, not the target. It’s fine for lights sitting under a solid, sheltered roof section, but IP65 or higher is the safer default for anything exposed to driving rain or wind-blown spray.
IP67 or IP68 for anything at ground level or near a water feature, where standing water or submersion is a real possibility.
Warm colour temperature, 2700 to 3000K, with a CRI of 80 or above so skin tones and food don’t look washed out.
Check dimmer compatibility before buying, since not every LED driver plays nicely with every dimmer switch, and mismatches cause flickering.
IK impact rating matters near play areas or garden tools, and a corrosion-resistant finish like marine-grade stainless or powder-coated aluminium earns its higher price on the coast or anywhere exposed.
The IP scale itself is simple once you know it: the first digit rates protection against solids, the second against liquids, so an IP44 fitting handles splashing while an IP65 fitting shrugs off a low-pressure jet.
Getting the controls right so you’re not fumbling for switches
Match the control to the zone rather than buying one system for the whole pergola.
Dimmers for the dining area, so task light can drop to something more relaxed once plates are cleared.
Astro timers or photocells for accent uplighting that should simply come on at dusk without you thinking about it.
PIR sensors for any path or step light, purely for safety underfoot.
Smart bulbs or a bridge system only if you actually want app control or scenes. A £15 mechanical timer does the same job for most people without a subscription or a firmware update.
Solar lights need realistic expectations: a fully charged unit typically runs six to eight hours, but a shaded panel in December will give you a fraction of that.
Materials and mounting details that keep the whole scheme looking sharp
Stainless fixings and UV-stable cable resist the slow discolouration and brittleness that cheaper plastics develop within a couple of summers.
Colour-match conduit to the structure so retrofitted cable runs disappear rather than standing out as an obvious afterthought.
Use marine-grade or powder-coated hardware near the coast, where salt air corrodes standard steel fixings within a year or two.
Box in or channel cable through beam cavities wherever the structure allows it, rather than leaving it clipped to the surface.
Site solar panels away from shade and tilt them toward the likely sun path, since even a small overhang cuts charging time significantly through the day.
Pro Tip: When you can’t route cable inside a beam, a slim trim strip painted to match the timber hides a surface-run cable almost as well as a proper channel, for a fraction of the joinery work.
Safety and UK regulations: the checklist you shouldn’t skip
Permanent outdoor lighting isn’t a DIY free-for-all, even though plenty of installations online suggest otherwise.
BS 7671 Section 714 governs permanent outdoor lighting installations, and most new outdoor circuits count as notifiable work under Part P.
30 mA RCD protection is mandatory for outdoor socket outlets and outdoor lighting circuits under Regulation 411.3.3, no exceptions for “it’s only a low-power fitting.”
Buried mains cable needs SWA (steel wire armoured) cable and a minimum burial depth, with route markers or tape so nobody digs into it while planting a shrub two summers later.
Every outdoor fitting and cable run should be mechanically protected against accidental damage from garden tools, trellis work, or curious pets, and ideally use Class II equipment where fixed properly and kept clear of contact.
Common defects worth checking for: an IP44 fitting mounted somewhere exposed, no RCD on the circuit, shallow burial depth, and cable left unsupported at height where it can snag.
Why a professional installation pays for itself
Infinityawnings has spent over 15 years designing and installing pergolas with partner brands including Weinor, Llaza, Selt, Tarasola, and Morvelle, and integrated lighting comes up on nearly every project. A professional build means cable channels routed in during construction, correctly IP-rated fittings specified for your exact site, and a Part P certificate you can hand to a future buyer. Before hiring anyone, ask for proof of registered competent person status, written warranties, and photos of previous installs, not just a verbal assurance that “it’ll be fine.”
What most pergola lighting advice gets wrong
Most guides treat lighting as decoration bolted onto a finished structure, when it works far better as a decision made alongside the pergola itself. The layering principle, ambient plus task plus accent, isn’t a stylistic preference; it’s the difference between a space that gets used year round and one that looks good in photos but sits dark by October because the single string of festoons isn’t bright enough to eat dinner by.
The conventional advice oversells smart control and undersells the wiring conversation. Nobody needs an app to dim a dining light, but plenty of people skip the RCD question entirely because the fittings themselves looked “outdoor rated” on the box. IP65 doesn’t protect you from an unprotected circuit, and that distinction gets buried under styling tips in most articles on this topic.
If you take one thing from all of this: decide your power method before you fall in love with a fixture. Solar and battery genuinely solve the wiring problem for casual use, but anything you want on every evening, all year, deserves a proper circuit fitted by someone qualified to sign it off.
— Andrew
Get your pergola lighting designed and installed properly
Infinityawnings gives you a fully specified pergola with lighting built in from the design stage, rather than a bare structure you then have to retrofit cable into yourself.

That means correctly IP-rated fittings chosen for your exact site, cable channels routed into the beams before assembly rather than clipped on afterwards, and a Part P certificate handed over at completion. You also get design support from people who’ve fitted lighting into hundreds of pergola installations across Yorkshire, Derbyshire, Nottinghamshire, and Lincolnshire, so the electrics and the structure are planned together rather than as separate afterthoughts. If your current pergola shopping list is starting to feel like a wiring project you didn’t sign up for, look at Infinityawnings’ pergola range or request a free quote through the pergola landing page to get a design specified around your garden.
Sources
Recommended
Comments