
9 essential outdoor structure safety tips for homeowners
- Andrew Crookes

- 5 minutes ago
- 12 min read
Get these nine actions right and you eliminate most of the risks that lead to garden accidents, insurance disputes, or expensive rebuilds: confirm your permissions and building control position, check foundations and fixings are sound, use treated timber with stainless or hot-dip galvanised fixings, install guarding wherever the regulations require it, sort drainage and slip resistance, make electrics safe, keep combustible storage well away from any structure, inspect on a set schedule, and secure everything before high winds arrive.
That’s the whole job in one sentence. The rest of this guide unpacks each point so you know exactly how to apply it to a shed, deck, pergola, or timber frame in your own garden.
Permissions first — check whether your project needs building control sign-off before you dig a single post hole.
Foundations and fixings — footings need to match ground conditions, and fixings need to resist decades of rain.
Correct materials — treated timber to the right use class, plus stainless steel or hot-dip galvanised fasteners.
Guarding where required — any raised platform needs edge protection at the correct height.
Drainage and grip — board gaps and gentle falls stop water pooling and algae building up.
Safe electrics — RCD protection and weatherproof fittings on anything outdoors.
Combustibles kept clear — fuel, gas bottles, and aerosols never sit against timber walls.
Scheduled inspections — spring, autumn, and after any storm.
Storm prep — loose panels, umbrellas, and canopies get secured or stowed before high winds.
Stop using the structure immediately if you spot serious rot at a post base, visible movement or racking, a snapped or badly split load-bearing timber, or fixings that have pulled loose. None of those are “keep an eye on it” situations.
Key Takeaways
Outdoor structure safety comes down to correct foundations, corrosion-resistant fixings, compliant guarding heights, and a maintenance routine that catches rot before it becomes structural failure.
Point | Details |
Check permissions early | Confirm building control and planning position before ordering materials, not after. |
Match fixings to timber | Use stainless steel or hot-dip galvanised fixings; avoid electroplated or uncoated steel. |
Guard at the right height | Decks over 600mm need 1,100mm guarding; infill gaps must not exceed 100mm. |
Inspect twice yearly | Check for rot, movement, and loose fixings in spring, autumn, and after storms. |
Call a professional when needed | Infinityawnings offers safety surveys, compliant guarding, and maintenance plans across Yorkshire and surrounding counties. |
Table of Contents
Pre-build checks and permissions to do before you start
Before any timber goes into the ground, walk the site with a tape measure and a camera. Confirm your boundary lines, locate underground services (call before you dig, always), check the fall of the land for drainage, and note any tree roots that might undermine a footing in five years’ time. Access matters too. If a cement mixer or a delivery of decking boards can’t reach the site without crossing a neighbour’s land or squeezing through a side gate, plan for that now rather than on installation day.
Permitted development rules give most garden outbuildings a fair amount of freedom, but there are firm limits on eaves height, overall height, proximity to boundaries, and the permitted development rules specifically restrict verandas or raised platforms above 0.3 metres without separate permission. Raised decking catches people out here more than any other structure. You must also check whether building regulations approval applies to your project, because skipping this step can mean fines, an enforcement notice requiring you to rip the work out, or an awkward conversation with a buyer’s surveyor when you come to sell.
Pro Tip: Ring your local building control team before you order materials, not after. A ten-minute phone call is far cheaper than remedial work.
Before you start, gather:
Dated photographs of the site from several angles
Your property’s boundary plan or title deed extract
Accurate measurements of the proposed structure and its distance from boundaries
Any existing planning correspondence for the property
Foundations, posts, joists and measures to ensure stability
Ground conditions dictate your foundation choice more than personal preference does. Concrete pad footings suit stable, well-drained soil and heavier structures. Screw anchors work well on lighter timber decks and avoid a weekend of digging and curing time, though they’re less suited to clay soils that shift with moisture. Strip footings come into play where a structure runs close to a boundary or carries an uneven load along its length.
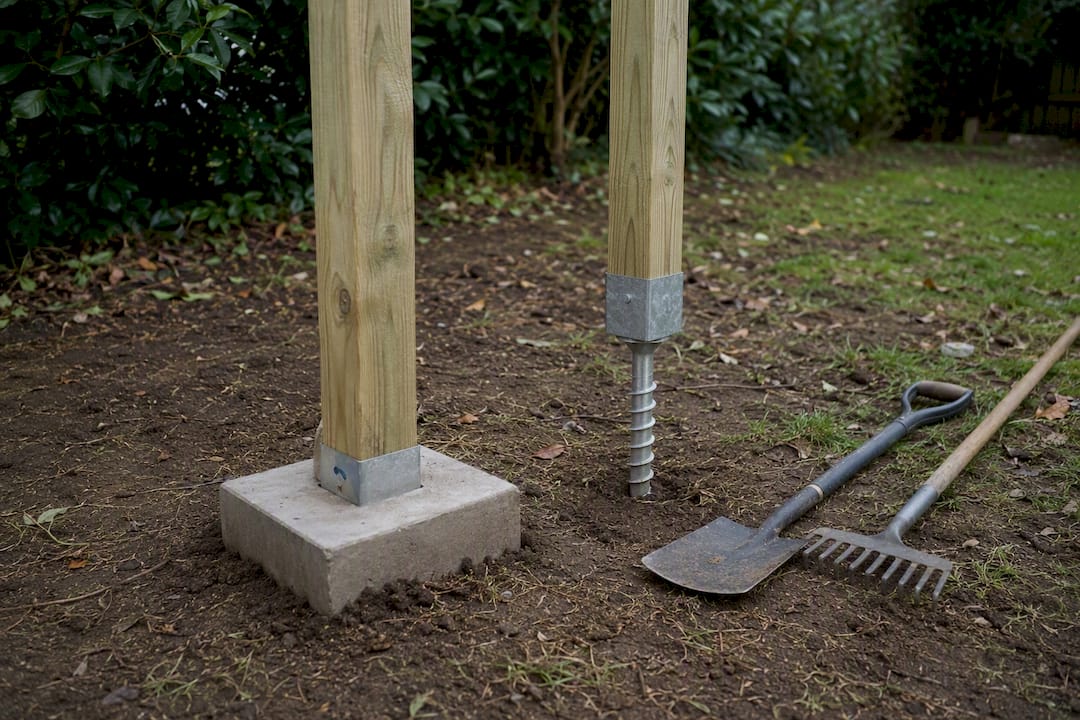
Post and joist sizing isn’t guesswork either. Structural timber is graded C16 or C24, with C24 offering higher strength for longer spans or heavier loads such as a pergola roof carrying planting or an integrated canopy. Approved Document K sets out that safe design comes from combining hazard identification with proper calculation of dead, imposed, and wind loads, not from copying a neighbour’s shed dimensions.
Call a structural engineer when you hit any of these:
Spans longer than around 3.6 metres without intermediate support
Unstable, waterlogged, or made-up ground
Heavy loads such as a green roof, hot tub, or multiple people gathering on a raised deck
Attachment to your house where the ledger board could bridge the damp proof course
Pro Tip: Leave a 10mm gap between decking and the wall, fit correct flashing above the ledger board, and never let a fixing punch through the damp proof course. Getting this wrong invites damp into your house, not just your deck.
A simple side-on diagram comparing a concrete pad footing against a screw anchor, both shown at the correct depth for a typical UK garden, makes this section far easier to follow than text alone.
Choosing timber, preservatives and corrosion-resistant fixings
Timber durability comes down to use class. Anything touching soil or sitting in permanent damp needs Use Class 4 treatment; above-ground structural members generally need Use Class 3. TRADA’s decking guidance recommends durable species or properly treated timber, C16 as a minimum strength grade, and C24 where domestic use is heavier than average, such as a large family deck.
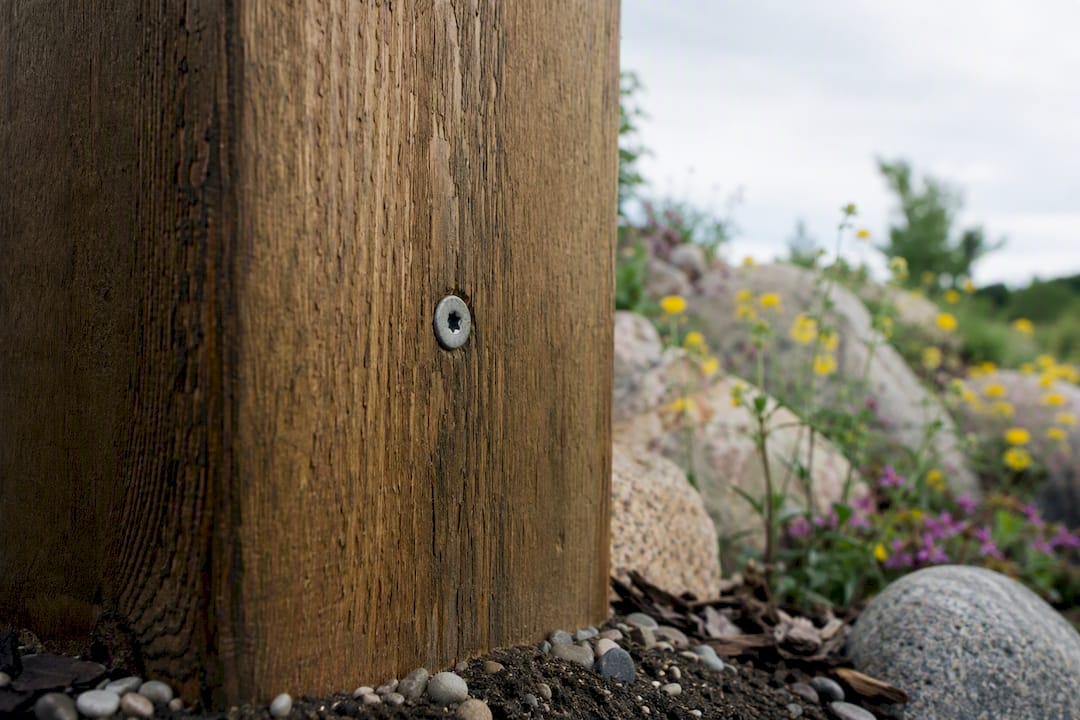
Corrosion is the real enemy of outdoor fixings, more so than the timber itself failing. Stainless steel and hot-dip galvanised fixings shrug off decades of rain; electroplated screws, brass, and uncoated steel corrode fast and can streak the timber with rust stains long before they actually fail.
Timber element | Recommended fixing |
Deck boards to joists | Stainless steel decking screws |
Joists to posts (structural) | Hot-dip galvanised bolts and brackets |
Newel posts and balustrades | Stainless steel through-bolts |
Ground contact posts | Hot-dip galvanised post supports |
Pre-drill hardwood before fixing to avoid splitting, swab any cut ends of treated timber with end-grain preservative, and never mix incompatible metals in contact with each other. Aluminium against untreated steel corrodes both far faster than either would alone.
Never use electroplated or uncoated steel screws outdoors
Avoid brass fixings on load-bearing timber joints
Keep fixing types consistent across a single structure
What are the fall protection rules for raised decks?
Guarding thresholds aren’t arbitrary numbers. Under Building Regulations K2, any deck or platform more than 600mm above ground needs guarding at a minimum of 1,100mm. Below that height, 900mm is the recommended standard, and infill spacing should never exceed 100mm, a gap deliberately chosen so a small child’s head can’t pass through. Industry guidance in the Timber Decking Handbook backs the same figures and stresses that parapets need to be designed into the deck from the start, not bolted on as an afterthought.
DIY balustrades are workable for lower decks with straightforward runs, but modular guarding systems sold for higher platforms should carry third-party load testing and accreditation. Fix newel posts through-bolted to the edge joist rather than screwed to the decking surface alone, and cap any exposed vertical timber ends so rainwater can’t sit and rot the grain from the top down.
Deck over 600mm: guarding at 1,100mm minimum
Deck under 600mm: 900mm recommended
Infill gaps: no more than 100mm anywhere
Newel posts: through-bolted to the joist, never just to decking boards
Hand this one to a professional if your deck exceeds the 600mm threshold, attaches awkwardly to the house, or carries a load pattern your standard balustrade kit wasn’t designed for.
How do you stop a timber deck becoming a slip hazard?
Board spacing does more work than most people realise. TRADA’s guidance recommends gaps of roughly 6 to 8mm between boards, wide enough for water to drain but tight enough that nothing catches a heel or a chair leg. Lay grooved boards with the grooves running in the direction of the fall, and build in a slight slope so water actually moves rather than pooling. TRADA’s separate drainage guidance confirms this is what stops algae building up in the first place, which is the real cause of most decking slips, not the timber itself.
Weekly sweeping keeps leaf litter and organic debris from feeding that algae growth. TDCA guidance recommends careful pressure washing and periodic reapplication of sealers or stains according to the manufacturer’s own schedule, since over-treating or under-treating both shorten a deck’s working life.
Sweep regularly to prevent algae build-up
Check the fall and drainage path after heavy rain
Inspect fixings twice a year for movement or lift
Add grip inserts or anti-slip strips on high-traffic steps
Pro Tip: Use the lowest effective pressure setting on a washer, keep the nozzle moving constantly, and never hold it close enough to the timber to strip the grain. A gouged board is weaker and grips water more, which defeats the entire point.
Electrics, fire safety and safe storage in sheds and outbuildings
Any fixed outdoor wiring needs a qualified electrician, full stop. Outdoor sockets and circuits should run through RCD protection, fittings need a weatherproof rating suited to their exposure, and any new circuit into your consumer unit should go through someone who understands the additional load it places on the system.
Fire risk in garden buildings usually comes down to storage habits rather than the structure itself. Fuel cans, gas bottles, and aerosols have no business sitting against a timber wall in an unventilated shed. Store them in a ventilated, purpose-made cabinet instead, ideally away from the main structure altogether if you keep more than a small quantity.
Never store petrol or gas canisters near an electrical consumer unit
Keep escape routes inside outbuildings clear, particularly in larger garden rooms used as workshops or offices
Fit smoke detection in any outbuilding used regularly, not just the main house
Ask about fire-retardant timber treatments if the building sits close to a boundary fence
Pro Tip: If your shed or garden room has become a workspace rather than storage, treat it like a small building with real fire risk, not a glorified cupboard. The regulatory principles behind early warning and clear escape routes still apply.
When should you stop using a garden structure?
A twice-yearly routine catches almost everything before it becomes dangerous. Walk the structure in spring and autumn, and again after any storm severe enough to rattle windows. Look for rot at post bases, loose or lifted fixings, any sign of racking or lean, cracked posts, standing water that never drains, and rust bleeding from fixing points.
Some findings mean you stop using the structure there and then, not “add it to the list for next weekend.” Visible structural movement, major rot at a post base, a large split running through a load-bearing timber, or a ledger board that’s pulled away from the wall are all immediate stop-use situations.
Spring and autumn: full visual inspection of posts, joists, and fixings
After storms: check for movement, lifted boards, and loose guarding
Ongoing: sweep, reseal on the manufacturer’s recommended cycle, and retighten fixings
Keep dated photographs of each inspection for insurance claims and future buyers
Insurers and surveyors both respond better to a documented maintenance history than a verbal assurance that “it’s always been fine.”
Bracing, ladders, PPE and safe working practice
Basic protective kit removes most of the risk from a weekend build. Safety glasses and gloves for cutting and fixing, hearing protection around power tools, sturdy boots that won’t slip on wet timber, hi-vis for anyone helping near a driveway or road, and a hard hat if you’re working under a partially built roof structure.
Ladder safety causes more DIY injuries than almost anything else on a build site. Set the ladder at the correct angle, secure the base on firm ground, and always have a second person steadying it for anything beyond a quick job. Scaffold towers or a qualified access supplier earn their cost the moment a job runs above head height for more than an hour.
Brace partially built frames overnight, especially in exposed gardens
Lift heavy posts and beams with a helper, not solo
Stop work in high winds or on wet, slippery timber
Dispose of offcuts and packaging promptly rather than leaving trip hazards underfoot
When to hire a pro, what to ask and contractor red flags
Some jobs genuinely need a professional, not because DIY guides lack detail, but because the consequences of getting them wrong are severe. Structural design for unusual spans, anything attaching to your house that could affect the damp proof course, complex electrical installations, and guarding on higher platforms requiring load testing all sit firmly in “call someone qualified” territory.
Before you hire, ask for proof of insurance and any relevant credentials, references from similar recent jobs, structural calculations where the work needs them, a realistic timescale, and clear warranty terms in writing.
Red flag: no insurance or unwilling to provide proof
Red flag: reluctant to give references or show past work
Red flag: a quote unusually low with no breakdown of materials or labour
Red flag: vague scope of work or a request for large cash payment upfront
Check membership of a relevant trade body where one exists, and keep every agreed scope and guarantee in writing before work starts.
What installers see that homeowners usually miss
Most of the structural problems I’ve come across on-site trace back to one thing: someone prioritised how a deck or pergola looked over how it drained. Water is the quiet killer of every timber structure. It doesn’t announce itself with a dramatic collapse; it sits in a post base for two winters and then, on the third, the timber simply gives way underfoot.
My priority order on a first visit is always the same. Stop anything actively dangerous first, whatever that costs to fix. Then sort water and drainage, because that’s what buys the structure another decade. Only after those two are settled does it make sense to talk about finishes, lighting, or aesthetic upgrades.
Immediate stop: any movement, rot at ground contact, or failed fixing
Schedule soon: poor drainage, missing flashing, undersized fixings
Consider later: re-staining, lighting, cosmetic guarding upgrades
Homeowners who follow that order rarely call us back with an emergency. The ones who chase the finish first almost always do.
How a professional installer can help with your safety checks
Reading a checklist is one thing; knowing your specific structure meets every threshold is another. Infinityawnings has spent over 15 years designing, supplying, and installing pergolas, verandas, and shading structures across Yorkshire, Derbyshire, Nottinghamshire, and Lincolnshire, working with established manufacturers including Weinor, Llaza, Selt, Tarasola, and Morvelle. That experience means a site visit picks up the fixing corrosion, drainage fall, or guarding gap that’s easy to miss from ground level with a tape measure and a Sunday afternoon.

An installer visit typically covers:
An on-site safety survey identifying immediate risks
Compliant guarding and parapet installation to the correct heights
Structural fixes for movement, rot, or failed fixings
Certified electrical work for lighting, heaters, and powered awnings
Ongoing maintenance plans to catch problems before they become red flags
If you’re weighing up a new pergola or want an existing structure checked over properly, the pergola design and installation page is the place to start. Request a free quote and a member of the team will talk through what your garden actually needs, not just what looks good in a brochure.
Frequently asked questions
What are the most important outdoor structure safety tips for a first-time DIY build? Check permissions before you start, use correctly graded timber with corrosion-resistant fixings, and install guarding to the correct height on anything raised above 600mm. Those three cover the majority of serious risks.
Do I need building regulations approval for a garden shed or deck? It depends on size, height, and proximity to boundaries. Many small outbuildings fall under permitted development, but raised platforms above 0.3 metres and larger structures often need building control involvement, so check with your local authority before building.
How high does decking guarding need to be under UK regulations? Under Approved Document K, decks above 600mm need guarding at a minimum of 1,100mm, while decks below that height should have guarding of at least 900mm, with infill gaps no wider than 100mm.
How often should I inspect my deck, shed or pergola for safety? Twice a year as a minimum, in spring and autumn, plus an extra check after any severe storm. Look specifically for rot at post bases, loose fixings, and any sign of movement.
When should I stop using an outdoor structure immediately? Stop straight away if you see structural movement, major rot at a post base, a large split in a load-bearing timber, or a ledger board pulling away from the house wall. These need professional assessment before the structure is used again.
This article is general information, not a substitute for advice from a qualified lawyer. Consult a qualified legal professional about your own circumstances before acting on anything here.
Sources
Recommended
Comments