Pergola installation guide: step-by-step for great results
- Andrew Crookes

- Apr 12
- 8 min read
TL;DR:
Proper planning and permission checks are crucial to avoid costly mistakes in pergola installation.
Accurate site measurement, correct tools, and proper fixings ensure a durable, long-lasting structure.
Focus on foundational steps like post setting and bracing, as they determine the pergola’s longevity.
Getting a pergola installed without a clear plan is one of the most frustrating experiences a homeowner or business owner can face. You order materials, start digging, and then realise halfway through that something is off. Posts are not level. Spacing is wrong. The whole structure looks tired before it is even finished. Across Yorkshire, Derbyshire, Nottinghamshire, and Lincolnshire, we have seen this happen far too often. The good news is that following a structured, stage-by-stage workflow removes almost all of that uncertainty. This guide maps every critical stage so you can approach your pergola project with confidence and finish with results you are genuinely proud of.
Table of Contents
Key Takeaways
Point | Details |
Plan before you build | Success starts with permissions and clear goals for your pergola project. |
Choose materials wisely | Select timber or aluminium based on desired look, maintenance needs, and regional climate. |
Follow each workflow step | Accurate footing, bracing, and level checks ensure a lasting structure. |
Avoid common DIY mistakes | Neglecting bracing and measurements can undermine the whole installation. |
Professional help pays off | Hiring experts can save time, reduce errors, and enhance the final result. |
Planning and permissions: getting your pergola started right
Every successful pergola project begins well before a single post goes into the ground. The pergola setup workflow starts with planning and a permissions check, and skipping this stage is where most projects run into early trouble.
The first question to answer is: what is this pergola actually for? Shade for a patio? A sheltered dining area for a restaurant? A stylish feature for a hotel garden? Your purpose shapes every decision that follows, from size and orientation to roofing style and materials. Spend time on this before anything else.
Location matters enormously. In Yorkshire and Lincolnshire especially, prevailing winds can be strong, so you want a spot that offers some natural shelter without creating a wind tunnel. South or south-west facing positions typically offer the best light and warmth across the region. Consider how shadows fall throughout the day and whether you want morning sun, afternoon shade, or both.
When it comes to permissions, most freestanding garden pergolas fall under permitted development rights and do not require formal planning permission. However, there are important exceptions:
Listed buildings or properties in conservation areas may require consent
Commercial properties such as restaurants, hotels, and bars almost always need to check with their local authority
Pergolas attached to the house may be treated differently to freestanding structures
Height restrictions and proximity to boundaries can trigger a planning requirement
Always contact your local council planning department before proceeding. It takes little time and can save you considerable expense later. Before you finalise your design, it also helps to understand understanding pergola types so you choose a structure suited to your goals.
“A pergola built in the wrong location, or without the right permissions, can be an expensive mistake. Five minutes on the phone with your council is always worth it.”
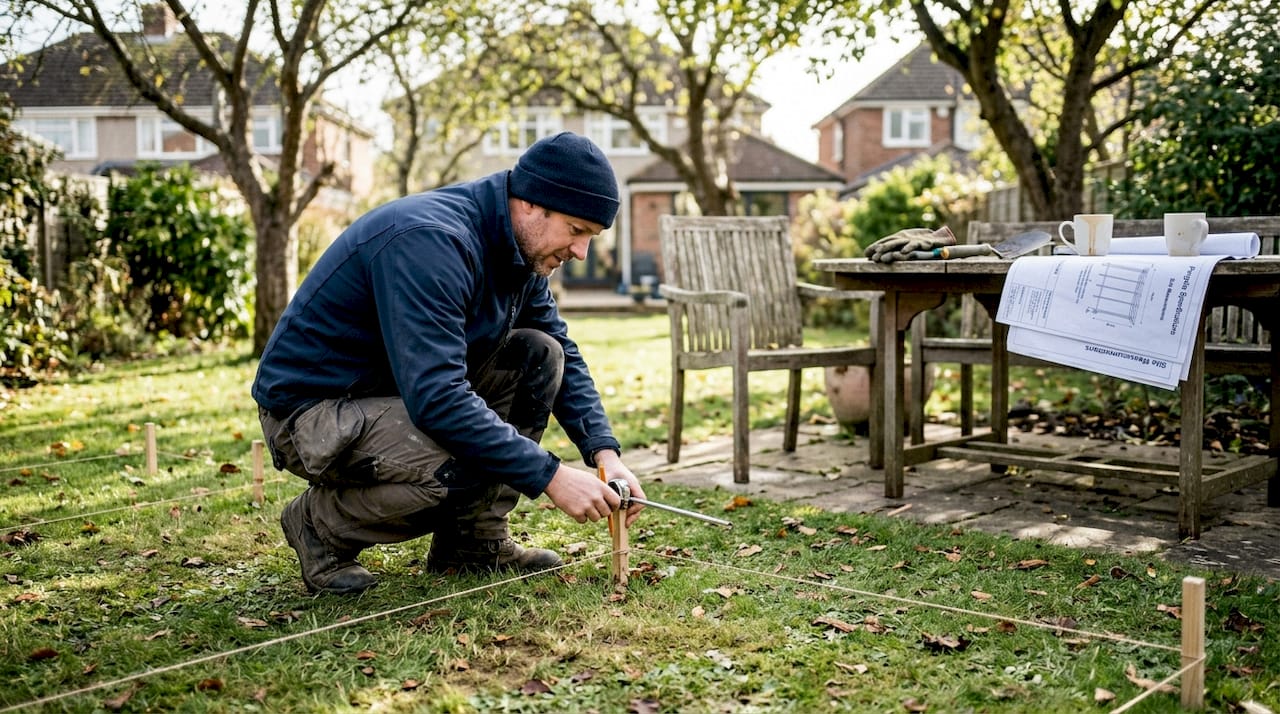
Pro Tip: Mark out your proposed pergola footprint with string lines and stakes before committing. Live with it for a day or two and observe how the light and space feel at different times of day.
Finally, always check for underground utilities before digging. Contact your utility providers or use a cable avoidance tool. This is a critical safety step that must never be overlooked.
Essential tools and materials: what you need before you build
With permissions and goals clarified, you will need the right gear and materials for a professional finish. Arriving at the build stage without a key tool or the correct fixings is a guaranteed way to lose half a day.
Must-have tools for pergola installation:
Post hole digger or auger
Spirit level (long and short)
Tape measure and string lines
Circular saw or mitre saw
Drill and impact driver
Concrete mixing equipment
Clamps and temporary bracing timber
Safety goggles and gloves
For larger or more complex structures, professional-grade post hole borers and laser levels make a real difference to accuracy. If you do not own these, hiring them is well worth the cost.
Material selection is where many people get caught out by the local climate. Yorkshire and Derbyshire winters are damp and cold, and materials that perform well in the south of England may not hold up as well here. Here is a quick comparison of the most common options:
Material | Durability | Maintenance | Best for |
Oak | Very high | Oiling required | Traditional, natural look |
Cedar | High | Oiling recommended | Warm, rustic finish |
Pressure-treated softwood | Moderate | Regular treatment | Budget-conscious builds |
Aluminium | Excellent | Very low | Modern, low-maintenance |
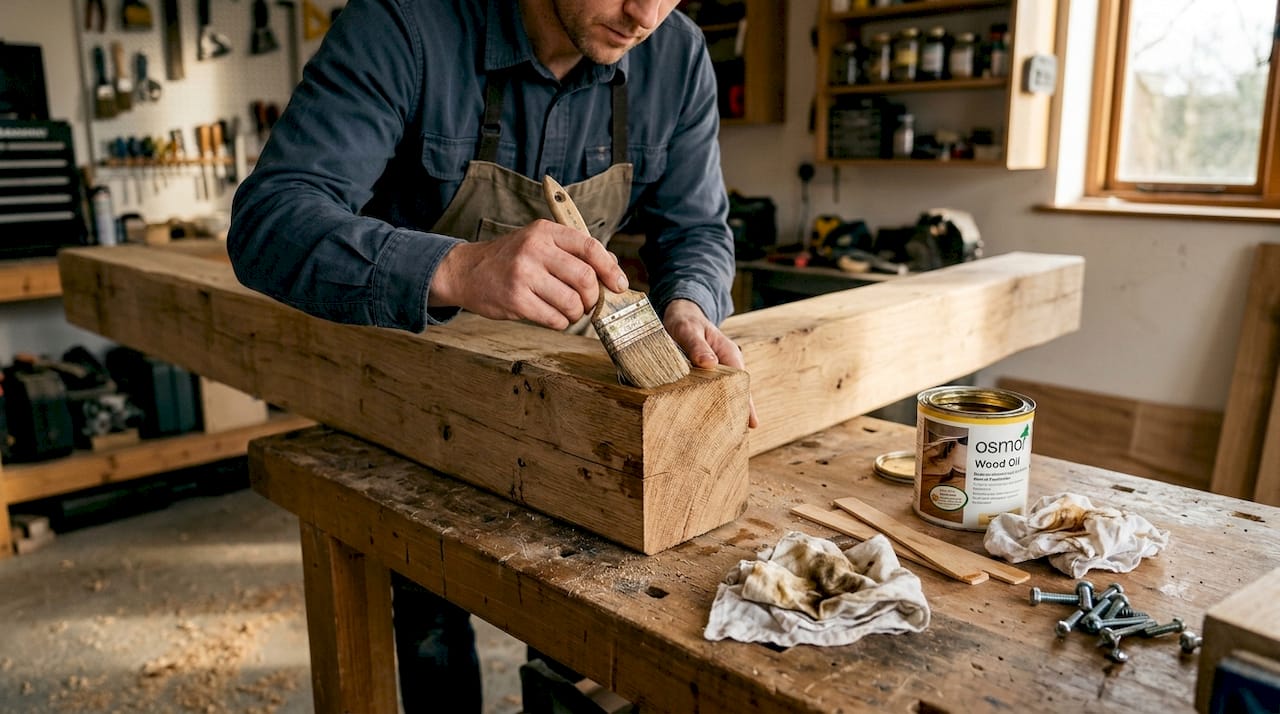
As noted in the pergola setup workflow, timber such as oak and cedar needs oiling, while aluminium is low maintenance and weather-resistant. For a deeper look at how these materials compare in practice, explore timber vs aluminium pergolas before you commit to a choice.
Fixings are just as important as the main structure. Use stainless steel or hot-dipped galvanised bolts and screws throughout. Standard zinc-plated fixings will corrode within a few seasons in our climate, leading to staining and structural weakness.
Pro Tip: If you are using oak or cedar, pre-oil all cut ends and joints before assembly. Moisture penetrates end grain fastest, and this one step can add years to the life of your timber.
Before purchasing materials, run through a key features checklist to make sure nothing is overlooked.
Step-by-step pergola installation workflow
With tools ready, you can follow these clear, actionable steps to install your pergola safely and to a high standard.
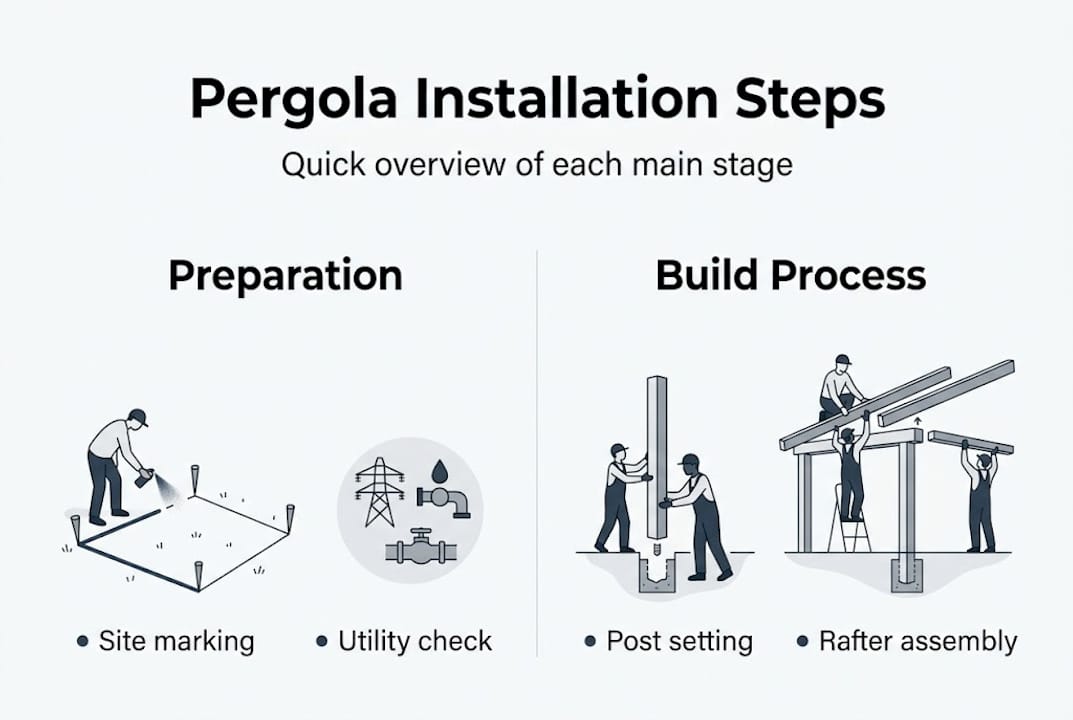
Confirm permissions and finalise location. Double-check your planning position and mark the exact footprint with string lines.
Mark post positions accurately. Use the 3-4-5 triangle method to ensure perfectly square corners before digging.
Dig post holes. Holes should be at least 600mm deep. In softer ground or for taller structures, go deeper.
Pour concrete and set posts. Mix and pour concrete, then brace posts temporarily. Allow 24 to 48 hours for curing before proceeding.
Check plumb on two faces. Use your spirit level on adjacent faces of each post. Do not rely on a single check.
Install the beam or wall plate. Secure beams to post tops using appropriate post caps or notched joints for added strength.
Fit the rafters. Space rafters evenly, typically 400 to 600mm apart. Use joist hangers or notched connections rather than simple face-fixing to prevent sagging.
Add cross-battens or roofing. Depending on your chosen style, install battens, polycarbonate panels, or louvred slats. For guidance on options, see pergola roofing choices.
Final level check. Walk around the structure and check everything is plumb, level, and square. Tighten all fixings.
For a full breakdown of each stage, the detailed pergola steps guide covers every decision point in depth.
Stage | DIY approach | Professional approach |
Post setting | Manual digging, hand-mixed concrete | Mechanical boring, ready-mix concrete |
Alignment | Spirit level and string lines | Laser level for precision |
Rafter fixing | Joist hangers, basic tools | Structural fixings, torque-controlled |
Final check | Visual and manual | Full structural sign-off |
A well-built pergola can last 20 years or more with proper maintenance. Rushing the post-setting and alignment stages is where most DIY builds fall short of that lifespan.
Common mistakes and troubleshooting tips
With the steps complete, let us make sure you avoid the most common pitfalls that can spoil an otherwise solid pergola project.
The most frequent errors we see across installations in Nottinghamshire and beyond are:
Inaccurate measurements leading to uneven post spacing and a structure that looks off from every angle
Skipping temporary bracing while concrete cures, allowing posts to shift before they are set
Using the wrong fixings that corrode quickly in damp northern conditions
Poor weatherproofing of timber end grain, leading to splitting and rot within a few seasons
Inadequate post depth, which causes movement and leaning over time
As the pergola setup workflow makes clear, posts must be braced temporarily, checked for plumb on two faces, and rafters should use joist hangers or notched joints to avoid sagging. These are not optional extras. They are the difference between a structure that lasts and one that disappoints.
“Check your post is plumb on two adjacent faces, not just one. A post can look perfect from the front and be leaning badly from the side.”
Quick fixes for common problems:
Leaning post: re-brace immediately if concrete has not fully cured; if cured, you may need to reset
Sagging rafter: add a joist hanger or introduce a mid-span support post
Rot at base: treat with end-grain preservative and consider a post base bracket to lift timber off the ground
Loose fixings: replace with longer, heavier-gauge stainless steel alternatives
Pro Tip: Before pouring concrete, check each post for plumb and re-check again after 30 minutes. Posts can shift slightly as you work around them, and catching this early costs nothing to fix.
If you are unsure whether your project is within DIY scope, the benefits of professional installers article is worth reading before you commit.
Our perspective: what most pergola guides miss
Most pergola guides spend a lot of time on aesthetics and materials, and relatively little on the fundamentals that actually determine whether a structure succeeds or fails. In our experience across hundreds of installations, the single biggest differentiator is not the quality of the timber or the design of the roofing. It is the rigour applied to site preparation, post setting, and bracing.
A pergola built on poorly set posts, or with rafters that were face-fixed rather than properly notched, will show its weaknesses within a season or two. Meanwhile, a modest timber structure built on perfectly plumb, well-concreted posts with correctly fitted rafters will still look great a decade later.
The in-depth workflow insights reinforce this point: the steps that feel tedious, checking levels twice, waiting for concrete to cure fully, using the right fixings, are precisely the ones that separate lasting results from disappointing ones. Shortcuts here cost far more to correct later than they save in the moment. Design is secondary to solid fundamentals. Always.
Enhance your space with professional pergola solutions
If you want professional results with genuine peace of mind, working with experienced local installers removes the guesswork entirely. At Infinity Awnings, we have spent over 15 years helping homeowners and businesses across Yorkshire, Derbyshire, Nottinghamshire, and Lincolnshire create outdoor spaces they love.
Whether you are looking for inspiration or ready to move forward, you can view local pergola solutions to explore the full range of styles and configurations we offer. If a covered structure with more weather protection appeals, our veranda installation services are worth exploring too. Get in touch today for a free, no-obligation quote tailored to your space and requirements.
Frequently asked questions
Do I need planning permission for a pergola in my garden?
Most freestanding pergolas do not need permission, but checks with your council are essential, especially for listed buildings or commercial properties. The permissions check is the first stage of any responsible installation workflow.
What’s the difference between timber and aluminium pergolas?
Timber pergolas such as oak and cedar require regular oiling and more maintenance, while aluminium models are durable, weather-resistant, and far lower maintenance over time.
How deep should pergola posts be set?
Posts should be set at least 600mm deep with concrete, and deeper in softer ground. Proper depth ensures long-term stability and prevents leaning.
What is the biggest mistake people make with pergola installations?
Skipping bracing and not checking plumb on two faces are the most common errors, and they quickly lead to leaning or sagging structures that are costly to correct.
How long does a pergola installation usually take?
A straightforward pergola typically takes two to four days, largely because concrete needs 24 to 48 hours to cure properly before the build can continue.
Recommended
Comments