
Designing school verandas: a workflow guide for UK architects
- Andrew Crookes

- 2 days ago
- 17 min read
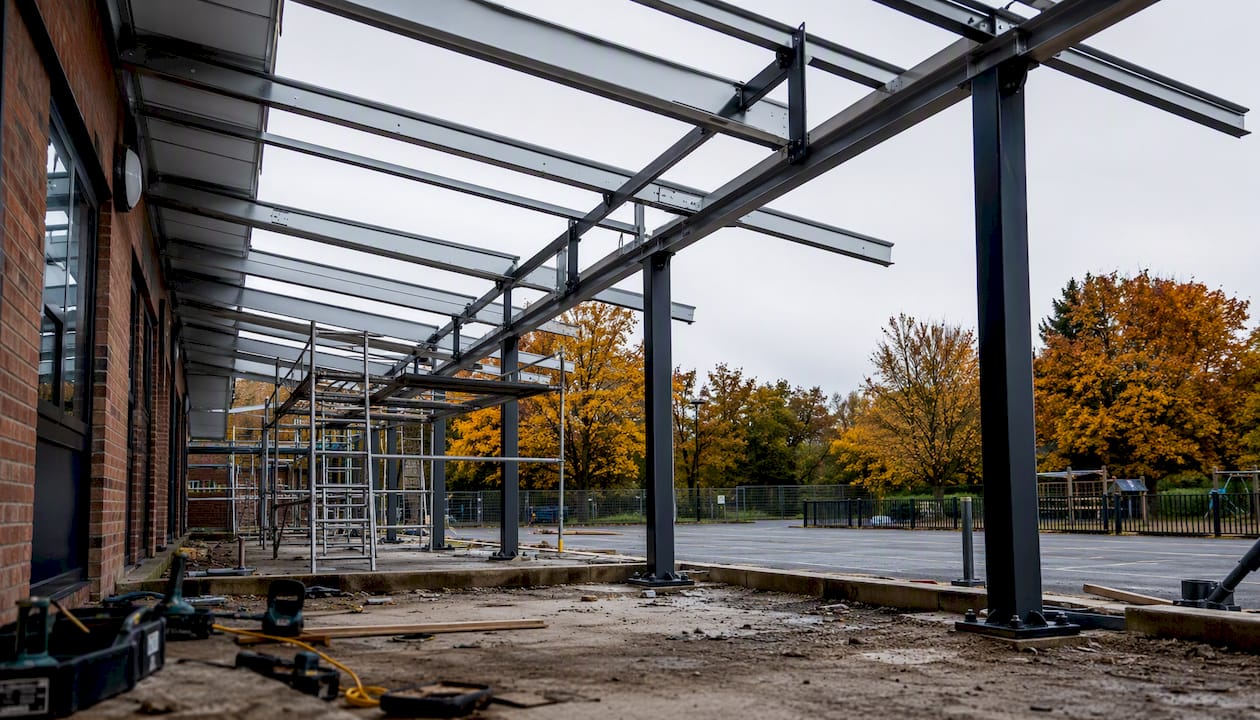
The recommended route for any UK school veranda project is a RIBA Plan of Work-aligned sequence running from strategic brief through to post-occupancy evaluation. Get three decisions right at the outset and the rest of the process flows: where the veranda faces (sun path and prevailing wind), what it is built from (aluminium, timber, or glazed), and how supervision sightlines are maintained for safeguarding. Miss any one of them in the brief stage and you will be redesigning at technical stage, which costs time schools rarely have.
Building Bulletin 71 (BB71), published by the DfE and still the primary reference for school grounds and outdoor classrooms, sets the educational and management framework that should sit behind every design decision. The RIBA Plan of Work provides the stage structure. Infinity Awnings can support the supply, specification, and installation phases once the design is resolved.
Workflow stages at a glance:
Stage 0 (Strategic Definition): Headteacher and governors agree the brief and budget band. Sign-off: client/headteacher.
Stage 1 (Preparation and Briefing): Site survey, BB71 review, safeguarding assessment. Sign-off: architect and site manager.
Stage 2 (Concept Design): Orientation study, zoning sketch, material shortlist. Sign-off: headteacher and LA/academy trust lead.
Stage 3 (Spatial Coordination): Technical drawings, structural and drainage details. Sign-off: architect and structural engineer.
Stage 4 (Technical Design): Tender pack, specification, CDM pre-construction information. Sign-off: principal designer and client.
Stage 5 (Manufacturing and Construction): Installation, site safety management. Sign-off: contractor and CDM principal contractor.
Stage 6 (Handover): Commissioning checks, as-built drawings, maintenance schedule. Sign-off: architect and headteacher.
Stage 7 (Use): Post-occupancy evaluation, staff and pupil feedback. Sign-off: school client.
Pro Tip: Brief the headteacher at Stage 0 using a one-page summary that names the three key decisions above. Schools that see orientation, material, and safeguarding addressed in the first document tend to move through governor approval faster.
Key takeaways
A RIBA-aligned workflow from strategic brief to post-occupancy evaluation, with orientation, material choice, and safeguarding sightlines resolved at Stage 2, is the most reliable route to a functional and compliant school veranda in the UK.
Point | Details |
Resolve three decisions at Stage 2 | Orientation, primary material, and safeguarding sightlines must be confirmed before technical drawings begin. |
Align to RIBA stages for sign-off clarity | Mapping deliverables to RIBA Stages 0–7 gives school clients and governors a clear approval structure. |
Match procurement route to contract value | Direct supply suits small projects; framework or open tender is required above the school’s delegated authority threshold. |
Check BB71 and funding deadlines early | BB71 sets the educational framework; outdoor learning funding rounds carry firm financial year deadlines that determine your programme start date. |
Infinityawnings covers supply through handover | Free site survey, bespoke supply, and installation across Yorkshire, Derbyshire, Nottinghamshire, and Lincolnshire, with maintenance packages included. |
Table of Contents
What does the designing school verandas workflow look like stage by stage?
How does site orientation shape the veranda’s form and position?
How do verandas support outdoor learning and curriculum delivery?
What structural forms and materials work best for school verandas?
What regulations and safeguarding requirements apply to school verandas?
What procurement routes and budgets apply to UK school verandas?
How do you coordinate installation and hand over a school veranda?
What experienced installers know that the drawings don’t show
Infinityawnings: specification, supply, and installation for school verandas
What does the designing school verandas workflow look like stage by stage?
Mapping the veranda design process to RIBA stages gives school clients a familiar procurement language and helps the design team set realistic expectations around deliverables and sign-offs. Welsh area guidance reinforces this approach, noting that aligning external space design to a Schedule of Accommodation and staged approval process helps clients see deliverables early and speeds procurement decisions within school funding cycles.
Stages, deliverables, and who signs what
RIBA Stage | Key Activity | Principal Deliverable | Responsible | Signs Off |
0 | Strategic brief, budget band, funding check | One-page project brief | Headteacher / governors | Client |
1 | Site survey, BB71 review, safeguarding check | Site survey report | Architect | Architect + site manager |
2 | Concept design, orientation study, zoning | Concept sketch + report | Architect | Headteacher + LA/trust |
3 | Structural coordination, drainage, accessibility | Coordinated drawings | Architect + structural engineer | Architect |
4 | Tender pack, specification, CDM pre-construction info | Tender documents | Architect + principal designer | Client + principal designer |
5 | Installation, site safety, phased access | Construction programme | Contractor | Principal contractor |
6 | Commissioning, as-built drawings, handover pack | Handover pack | Architect + contractor | Headteacher |
7 | Post-occupancy evaluation, maintenance review | Evaluation report | School + architect | School client |
Typical project timelines
Small verandas (a single bay, open-sided, no services) can move from brief to handover in 12–16 weeks when procurement is direct supply and install. Medium projects with glazed roofs, drainage connections, and electrical services typically run 20–28 weeks. Large or complex verandas requiring planning permission, structural engineering sign-off, and framework procurement should be programmed at 36–48 weeks minimum.
Roles matrix in brief:
Architect: produces all design drawings, coordinates structural and drainage engineers, manages CDM principal designer duties where required.
Structural engineer: checks foundations, column loads, and roof fixings; provides calculations for Building Control.
School client (headteacher/site manager): provides access, approves concept and technical stages, signs off handover.
Governors/LA/academy trust: approve budget and procurement route at Stage 0; may require a second sign-off at Stage 4 for contracts above their delegated authority threshold.
Contractor: manages installation, holds CDM principal contractor duties, provides commissioning records.
CDM principal designer: coordinates pre-construction health and safety information; required when more than one contractor is involved.
Pro Tip: Send the Stage 2 concept sketch to the site manager before the headteacher sees it. Site managers know where the drainage runs, where deliveries arrive, and which corner of the playground is always in shadow. Their input at concept stage prevents expensive revisions at Stage 3.
How does site orientation shape the veranda’s form and position?
Environmental analysis is where most school veranda projects go wrong, and it almost always happens because the site survey was too brief. A proper survey takes half a day minimum and produces a record that drives every subsequent design decision.
Essential site checks:
Sun path: note the angle of morning sun (east-facing facades) and afternoon sun (west-facing). A south-facing veranda without adequate overhang will be unusable in summer; a north-facing one may be permanently cold and damp.
Prevailing wind direction and any local funnelling effects between buildings.
Noise sources: roads, playgrounds, mechanical plant, neighbouring properties.
Proximity to boundaries and overlooking windows (safeguarding and planning considerations).
Existing tree canopy: note species, approximate root protection zones (typically 12 times the trunk diameter), and any Tree Preservation Orders.
Existing drainage runs, gullies, and surface water flow paths.
Ground levels: record spot levels on a grid at 2m centres across the proposed veranda footprint.
Existing surface types and their condition (tarmac, paving, grass, rubber).
Utility services: gas, water, electricity, and data routes near the proposed footprint.
The Primary Schools Building Handbook emphasises retaining existing site features and providing a planting framework that integrates external spaces with the building. That principle applies directly to veranda siting: work around the trees, not through them.
Orientation and its design consequences
A south-facing veranda needs a deep overhang or a retractable shading system to remain usable between 10 AM and 3 PM in summer. North-facing positions offer consistent, glare-free light suited to focused learning activities but require attention to natural ventilation to prevent damp. East-facing verandas work well for morning outdoor sessions; west-facing ones suit afternoon play and after-school use but need shading from low evening sun.
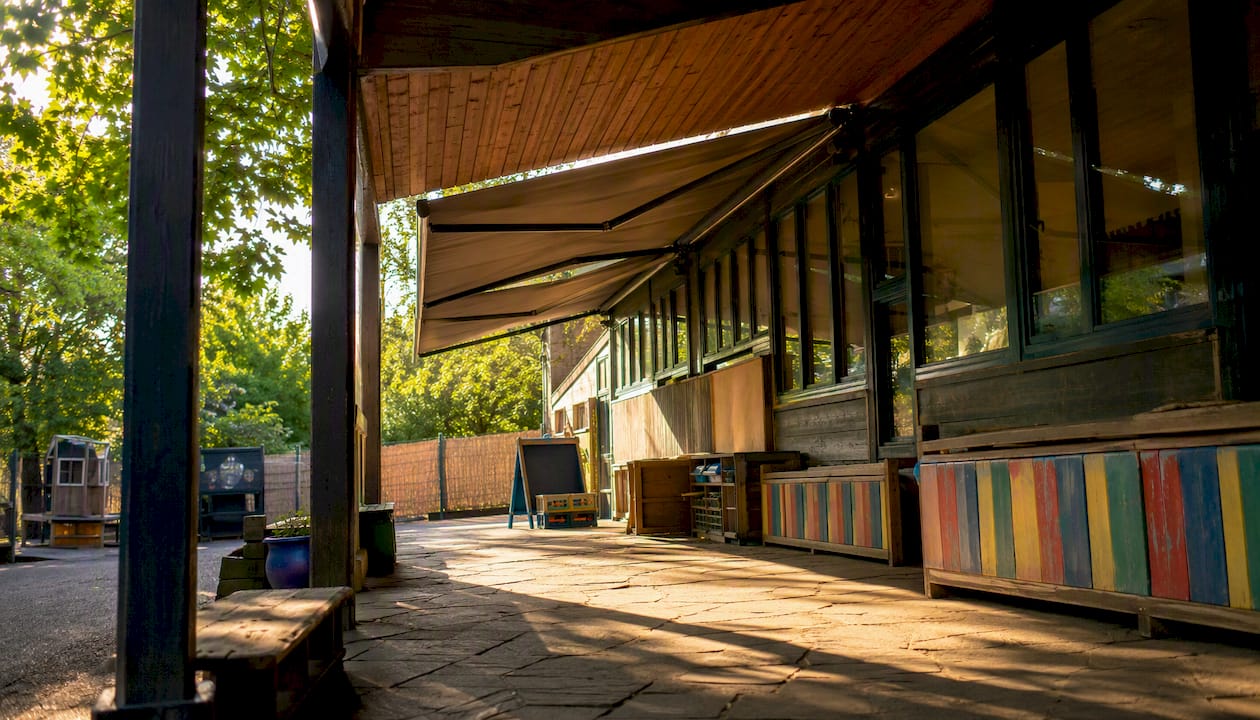
Glazed roofs on south-facing structures require solar control glass or an integrated blind system. Polycarbonate panels on a south-facing pitch can overheat a space to the point of unusability without adequate ventilation panels or ridge vents. These are not details to resolve at Stage 3; they belong in the Stage 2 concept report.
Pro Tip: Use a free sun-path tool such as the Suncalc web application to overlay sun angles on your site photograph before the first client meeting. Showing the headteacher exactly where shadow falls at 10 AM in October is far more persuasive than a written description.
How do verandas support outdoor learning and curriculum delivery?
The Outdoor Learning Project guidance is clear: outdoor provision should be treated on a par with indoor teaching in terms of planning, staffing, and resourcing. That means the veranda brief must explicitly link spatial features to curriculum outcomes, not simply describe a covered area.
Typical activities and their spatial requirements
A well-designed school veranda should accommodate:
Story time and whole-class teaching: requires a clear floor area of at least 30m² for a class of 30, with acoustic treatment or solid side panels to reduce wind noise.
Small-group work: 2–3 smaller zones of 6–8m² each, ideally with fixed or moveable seating and a writable surface nearby.
Messy activities (science, art, DT): proximity to a water point, a hard washable floor surface, and storage for materials.
Sheltered play: open edges or retractable screens to allow movement, with a rubber or resin-bound surface for impact absorption.
Sensory and nature observation: planter boxes integrated into the veranda edge or adjacent beds, linked to science and PSHE outcomes.
Activity zoning
Teaching zone: positioned at the building end of the veranda, closest to the classroom door, with the best sightlines for the teacher.
Storage and kit zone: a lockable store (minimum 1.5m × 1.0m) adjacent to the teaching zone, accessible without crossing the play area.
Flexible play zone: the open end of the veranda, with a surface suited to movement and easy cleaning.
Circulation and supervision corridor: a clear 1.2m-wide path along one edge, unobstructed by furniture, giving staff a direct sightline from the classroom door to the far end of the veranda.
Organisations such as Groundwork and Learning through Landscapes provide practical case studies on integrating nature and outdoor learning into school grounds, and their examples consistently show that zoned spaces outperform undifferentiated covered areas for curriculum use.
What structural forms and materials work best for school verandas?
Material choice drives cost, maintenance burden, and longevity. There is no universally correct answer, but there are clear trade-offs that should be resolved at Stage 2 rather than left to the contractor.
Structural types
Cantilevered aluminium veranda: the most common choice for UK schools. Powder-coated aluminium columns and rafters carry a mono-pitch or dual-pitch roof. No mid-span columns means an unobstructed floor area, which suits supervision. Typical lifespan exceeds 25 years with minimal maintenance. The main limitation is span: cantilevers beyond 4m require heavier sections and a more substantial foundation, which increases cost.
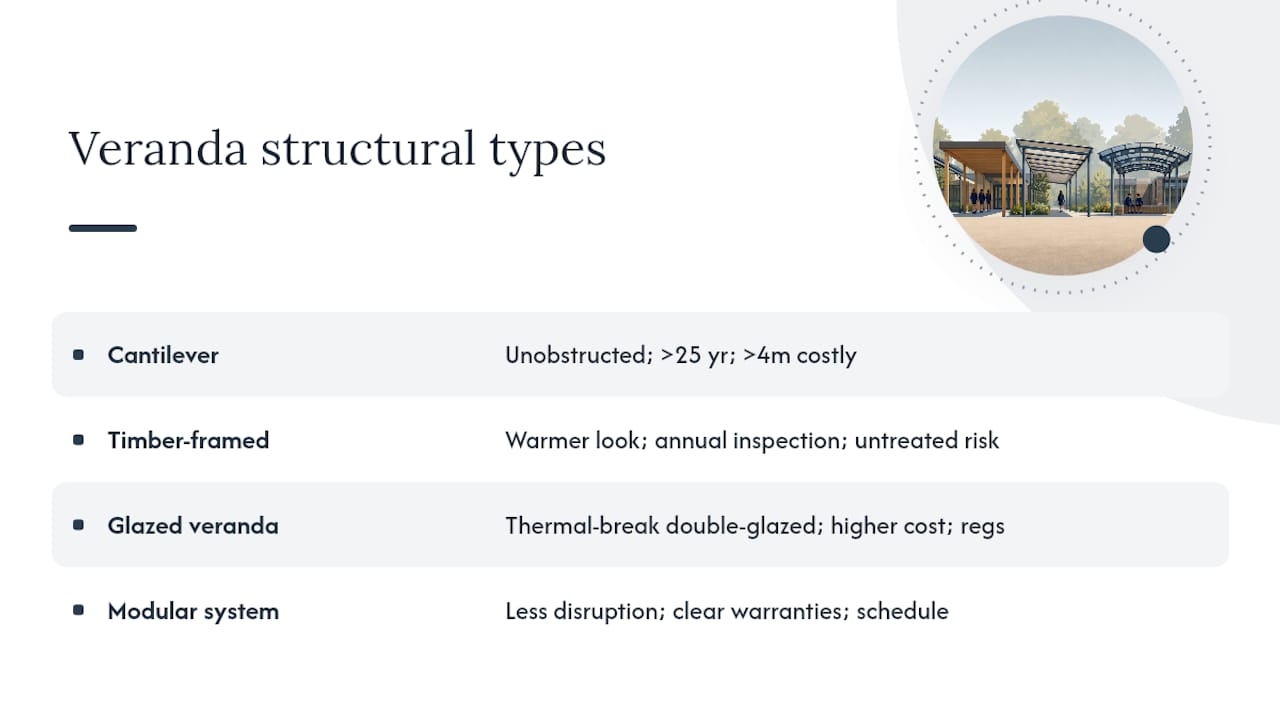
Timber-framed veranda: visually warmer and often preferred by schools with a heritage aesthetic or a sustainability agenda. Pressure-treated softwood or engineered hardwood both perform well in the UK climate, but annual inspection and periodic re-treatment are non-negotiable. Untreated or poorly maintained timber in a school environment becomes a liability within five years.
Glazed veranda with thermal break: appropriate where the space needs to function as a near-indoor environment in winter. A thermally broken aluminium frame with double-glazed panels and an insulated roof can extend outdoor classroom use across the full school year. Cost is significantly higher than an open-sided structure, and Building Regulations compliance (Part L thermal performance, Part B fire separation from the main building) must be confirmed at Stage 3.
Specifying a modular or bolt-together veranda system reduces on-site disruption, creates cleaner warranty boundaries, and gives the school a maintenance schedule tied to identifiable components rather than a bespoke structure that only the original contractor fully understands. For schools managing their own maintenance budgets, that clarity has real operational value.
Roofing and weather protection
Single-slope (mono-pitch) roof: simplest to detail and drain; suits lean-to configurations against an existing wall.
Pitched roof: better for larger spans; requires more structural depth but sheds water more effectively.
Translucent polycarbonate panels: low cost, lightweight, admits daylight; degrades and yellows over 10–15 years and can be noisy in heavy rain.
Insulated glazed roof: best thermal and acoustic performance; highest cost; requires regular cleaning of glass surfaces.
Integrated gutters and rainwater disposal: always specify gutters sized for a 1-in-100-year storm event and route downpipes to a soakaway or surface water drain, never to a foul drain.
For side infill, fixed glazing suits teaching zones where wind exclusion matters; operable mesh screens suit play zones where ventilation and supervision take priority. Acoustic performance of side panels is worth specifying: a minimum Rw of 20 dB is achievable with 6mm toughened glass and reduces wind noise enough to make outdoor teaching viable on most UK school days.
Pro Tip: Ask the contractor for a sample panel of any polycarbonate product and leave it south-facing on site for one month before specifying. Yellowing and surface crazing are visible within weeks on lower-grade products.
Maintenance intervals by material
Powder-coated aluminium: inspect fixings and seals annually; repaint or re-coat every 15–20 years.
Pressure-treated timber: inspect annually; re-treat end grain every 2–3 years; full re-treatment every 5 years.
Polycarbonate panels: clean twice yearly; inspect for crazing and UV degradation every 3 years; replace panels at 10–15 years.
Sealed glazing units: inspect seals annually; replace failed units as identified; clean glass quarterly.
For detailed veranda maintenance schedules by material type, the Infinityawnings resource covers service intervals and inspection checklists suited to school environments.
What regulations and safeguarding requirements apply to school verandas?
Compliance for a school veranda touches several overlapping frameworks. None of them are optional, and the order in which you engage them matters.
Compliance checklist
Building Bulletin 71: sets the educational and management context for outdoor classrooms; use it to justify spatial decisions and activity zoning in the design report.
Building Regulations (England): Part A (structure), Part B (fire), Part C (moisture), Part F (ventilation), Part K (protection from falling), and Part M (accessibility) are all potentially relevant depending on the veranda’s size, enclosure, and proximity to the main building. Confirm with Building Control at Stage 2 whether a formal application is required.
Equality Act 2010: all new external structures at schools must be fully accessible. Thresholds must be flush or ramped at a maximum gradient of 1:20; door widths (where doors are included) must meet Part M minimum clear widths of 775mm.
CDM Regulations 2015: where more than one contractor is involved, a principal designer and principal contractor must be appointed. Even for smaller single-contractor projects, the client must be made aware of their CDM duties.
Planning permission: modest open-sided timber or aluminium shelters often fall within permitted development for schools, provided they are below 3m in height, set away from boundaries, and carry no permanent services. Glazed or enclosed structures, or any structure on a listed site, typically require a formal application. Confirm with the local planning authority at Stage 1 via a pre-application enquiry.
HSE guidance on health and safety for outdoor settings should inform the project’s risk assessment from Stage 1 onwards, covering supervision, access control, and commissioning checks before the veranda is handed over to pupils.
Safeguarding layout
Play Scotland’s risk management guidance advocates a risk-benefit approach: design for appropriate challenge and supervision rather than eliminating all risk. For school verandas, that translates into three layout rules:
Supervised entry and exit: the veranda should have a single primary access point visible from the classroom or a staffed supervision point.
Sightlines: no structural element, storage unit, or planting should create a blind spot larger than 1m² within the veranda footprint.
Separation from vehicular routes: a minimum 2m physical barrier (fence, planting, or kerb) between any veranda edge and a vehicle access route.
Embed regulatory notes directly on drawings at Stage 3: note the accessible ramp gradient, the fire escape clearance distance, and the CDM notification status in the drawing title block. This keeps compliance visible without cluttering the specification with full legal text.
How should you handle surfacing, levels, and drainage?
Surface choice is often treated as a finishing detail, but it determines slip resistance, maintenance cost, and whether the veranda is usable in wet weather. Decide it at Stage 2 alongside the structural form.
Surface options
Resin-bound aggregate: excellent slip resistance when correctly specified (minimum 6mm aggregate, BS 7533-compliant); permeable; suits teaching and play zones; requires re-sealing every 5–7 years.
Porous asphalt: lower cost; good drainage; less visually refined; suits play zones and circulation areas.
Paving (natural stone or concrete flags): durable and low maintenance; requires precise levelling to avoid trip hazards; non-permeable, so drainage channels must be designed in.
Rubber safety surfacing: appropriate where impact attenuation is required (play equipment adjacent); clean easily; UV degradation reduces performance after 10–12 years.
Level transitions and accessibility
Establish the finished floor level of the veranda relative to the adjacent classroom floor and the external yard.
Where a level change is unavoidable, provide a ramp at 1:20 maximum gradient with a non-slip surface and handrails at 900mm and 600mm heights.
Detail a 150mm upstand at the building junction to prevent water ingress, with a threshold ramp over it to maintain accessibility.
Ensure all drainage channels and gully covers are flush with the finished surface and rated for pedestrian loading.
Drainage and tree root protection
Veranda roof run-off must be calculated and routed to an appropriate outfall. A 50m² roof in a UK design rainfall event (typically 75mm/hour for a 1-in-100-year storm) generates significant flow; size gutters and downpipes accordingly and confirm the outfall capacity with the drainage engineer at Stage 3.
Where trees are present, avoid excavation within the root protection zone. Use no-dig surfacing systems (open-cell paving grids or resin-bound aggregate on a permeable sub-base) within 3m of any significant tree. A tree survey referenced to BS 5837:2012 should be commissioned at Stage 1 if any tree is within 5m of the proposed structure.
Design guides and local authorities consistently emphasise retaining existing site features and providing a planting framework to integrate external spaces with the building, as noted by Architecture and Design Scotland. A veranda that destroys a mature tree to gain a metre of clearance is a poor trade in any school environment.
What procurement routes and budgets apply to UK school verandas?
Procurement route determines timeline, cost control, and the school’s exposure to risk. Get this decision made at Stage 0, not after the technical drawings are complete.
Common procurement routes
Direct supply and install: the school appoints a specialist supplier directly. Fastest route; suits smaller projects (single-bay verandas, open-sided structures) where the design is straightforward and the supplier can produce their own technical drawings. Typical lead time from order to install: 6–10 weeks.
Framework procurement: many academy trusts and local authorities hold framework agreements with pre-approved suppliers. Mini-competitions within a framework are quicker than open tender and provide cost benchmarking. Required for contracts above the school’s delegated authority threshold (check with the trust or LA finance team).
Open tender: appropriate for larger or more complex projects where the design is fully specified and competitive pricing is the priority. Adds 8–12 weeks to the programme but provides the strongest audit trail for public funding.
Typical budget bands
These are indicative ranges based on current UK market conditions and will vary by region, site complexity, and specification. Always obtain at least two competitive quotes before committing.
Funding and timeline notes
The Outdoor Learning Project guidance specifies that funding rounds carry firm financial year deadlines: for the 2025 round, orders and receipts were required by 31 March 2025. Future rounds will carry equivalent deadlines. Schools using ring-fenced outdoor learning funding must align their procurement programme to the financial year, which means starting the design process no later than October for a March completion.
Phased delivery reduces upfront cost and shortens initial delivery time. Starting with the core sheltered structure and adding electrical services or glazed infill panels in a second phase is a well-established approach that gets curriculum benefit earlier while spreading capital expenditure across two financial years.
Pro Tip: If the project is above the school’s delegated authority threshold, get the trust or LA procurement lead involved at Stage 0, not Stage 4. Discovering a framework requirement after the tender pack is written costs weeks.
How do you coordinate installation and hand over a school veranda?
Installation on a live school site requires more planning than a comparable commercial project. Pupils, safeguarding, and the school timetable all constrain what is possible and when.
Site coordination
Plan installation during school holidays wherever possible. If term-time working is unavoidable, establish a 2m hoarding perimeter around the works and a separate contractor access route that does not cross pupil circulation areas.
Agree a daily start and finish time with the site manager that avoids arrival and departure periods.
Ensure all contractors on site have current DBS checks or are escorted at all times by a member of school staff.
Notify parents if works are visible from the school boundary or affect drop-off arrangements.
Commissioning checklist
Before the school accepts the veranda, the contractor should demonstrate and record:
Structural fixings torqued to specification and signed off by the structural engineer.
Drainage test: run water from the roof and confirm all outlets discharge correctly with no ponding on the veranda floor.
Threshold and level checks: confirm ramp gradients and surface levels against the accessible design specification.
Glazing seals: inspect all perimeter seals for continuity; check for condensation between panes on insulated units.
Electrical safe-to-use certificate (where services are present): issued by a Part P-registered electrician.
Structural sign-off from Building Control (where a formal application was made).
HSE guidance on outdoor site safety should be referenced during the commissioning stage to confirm that supervision arrangements, access controls, and any residual risks have been documented and communicated to the school.
Handover pack contents
As-built drawings (plan, elevation, drainage layout).
Operation manual for any moving parts (retractable screens, electric blinds, automated ventilation).
Maintenance schedule with service intervals by component.
Warranties: structure (minimum 10 years), glazing units (minimum 5 years), electrical components (minimum 2 years).
Contact details for the installer’s aftercare team.
Commissioning records and any Building Control completion certificate.
Post-installation, run a structured feedback session with staff and, where age-appropriate, pupils after the first half-term of use. Ask specifically whether the teaching zone works as intended, whether storage is adequate, and whether any drainage or surface issues have emerged. Feed findings into a brief Stage 7 evaluation note and share it with the design team.
Pro Tip: Ask the contractor to walk the site manager through the maintenance schedule on handover day, not just hand over a document. A site manager who understands what to inspect and when is the single most effective long-term maintenance tool a school has.
Printable checklists and a sample brief for client meetings
Sample brief template
Project title: [School name] outdoor veranda Purpose: Covered outdoor learning and play space linked to [curriculum areas] Target activities: Whole-class teaching, small-group work, sheltered play, Budget band: £[X] to £[Y] (confirm with governors/trust) Accessibility requirements: Full DDA compliance; flush thresholds or 1:20 ramp; minimum 1.2m circulation width Curriculum links: [e.g. science observation, literacy outdoor sessions, EYFS outdoor play] Preferred materials: [Aluminium / timber / glazed / client preference] Maintenance constraints: [Annual inspection only / school caretaker to maintain / full service contract required] Key constraints: [Planning restrictions, tree protection orders, term-time access only]
Site survey checklist
Existing ground levels (spot levels on 2m grid)
Sun path recorded at 9 AM, 12 PM, and 3 PM (summer and winter)
Prevailing wind direction and any local funnelling
Tree species, trunk diameter, and estimated root protection zones
Existing drainage gullies and surface water flow paths
Utility services (gas, water, electricity, data) within 5m of proposed footprint
Boundary distances and any overlooking windows
Existing surface types and condition
Photographs: all four elevations of the proposed location, plus sightlines from classroom doors
Technical brief checklist
Structural type confirmed (cantilevered aluminium / timber frame / glazed)
Roof type and glazing specification confirmed
Drainage outfall agreed with drainage engineer
Accessibility standard confirmed (Part M, Equality Act)
CDM duties allocated (principal designer named if required)
Planning pre-application submitted or permitted development confirmed
Building Control pre-application submitted (if required)
Fire separation distance from main building confirmed
Procurement and commissioning sign-off checklist
Procurement route agreed with LA/trust finance team
Contract value confirmed against delegated authority threshold
Tender pack issued and returned
Contract signed and CDM notification submitted (if required)
Commissioning records received and checked
Handover pack received and filed
Building Control completion certificate received (if applicable)
Stage 7 evaluation date agreed with school
For a broader look at school outdoor space ideas and how verandas fit into a wider grounds strategy, the Infinityawnings resource covers concept-stage inspiration alongside practical specification notes.
What experienced installers know that the drawings don’t show
The gap between a well-drawn veranda and a well-functioning one is almost always found in the details that only become visible on site. Hidden drainage runs, tree roots that extend well beyond their visible canopy, and existing concrete slabs at unexpected depths are the three most common surprises that add cost and delay to school veranda projects.
The most consistent advice from experienced installers is to over-specify the drainage connection at the outset. A 100mm downpipe costs little more than a 68mm one at installation, but the difference in performance during a heavy autumn downpour is significant. Schools that have experienced a flooded veranda floor after the first winter are rarely persuaded that the original drainage specification was adequate.
Two further points worth carrying into every specification:
Specify powder-coated aluminium over painted steel for any structural component. Steel corrodes at fixings and joints within five years in a school environment where cleaning chemicals and moisture are routine. Aluminium’s maintenance cycle is a fraction of the cost.
Integrate lighting at Stage 3, not as a later add-on. Conduit routes through aluminium sections are straightforward to include during fabrication and nearly impossible to retrofit cleanly. Schools that add lighting after handover typically end up with surface-run cables, which are both a maintenance liability and a safeguarding concern.
Infinityawnings brings over 15 years of installation experience to school projects, including bespoke configurations with integrated LED lighting, heating elements, and retractable screens. Educational outdoor shelter examples from completed school installations illustrate how these details translate into finished structures.
Infinityawnings: specification, supply, and installation for school verandas
School veranda projects need a supplier who understands both the design process and the constraints of a live educational site. Infinityawnings works with architects, school planners, and facilities teams across Yorkshire, Derbyshire, Nottinghamshire, and Lincolnshire to take projects from specification through to commissioned handover.
The service covers free site survey and specification support, bespoke supply from premium brands including Weinor, Tarasola, and Morvelle, professional installation coordinated around the school timetable, and ongoing maintenance packages with documented service intervals. Infinityawnings aligns to the RIBA workflow: the team can engage at Stage 2 to advise on material and structural options, produce supplier drawings for Stage 3 coordination, and manage the full Stage 5 installation with CDM-compliant site management.
For schools working within framework procurement or academy trust approval processes, Infinityawnings can provide the specification documentation and warranty pack the trust finance team will require. To arrange a free site survey and outline specification, visit the pergolas and verandas page or contact the team directly to book a site visit.
Sources
Recommended
Comments