How to install school awnings for durable outdoor spaces
- Andrew Crookes

- 1 day ago
- 10 min read
School administrators across Yorkshire, Derbyshire, Nottinghamshire, and Lincolnshire face a persistent challenge: maximising outdoor space usability throughout the year despite unpredictable British weather. Installing durable, compliant awnings transforms underutilised playgrounds, dining areas, and learning zones into functional year-round environments. This guide walks you through planning permissions, site preparation, installation procedures, and maintenance requirements specific to educational institutions in these regions, ensuring your awning project meets safety standards whilst enhancing student experiences outdoors.
Table of Contents
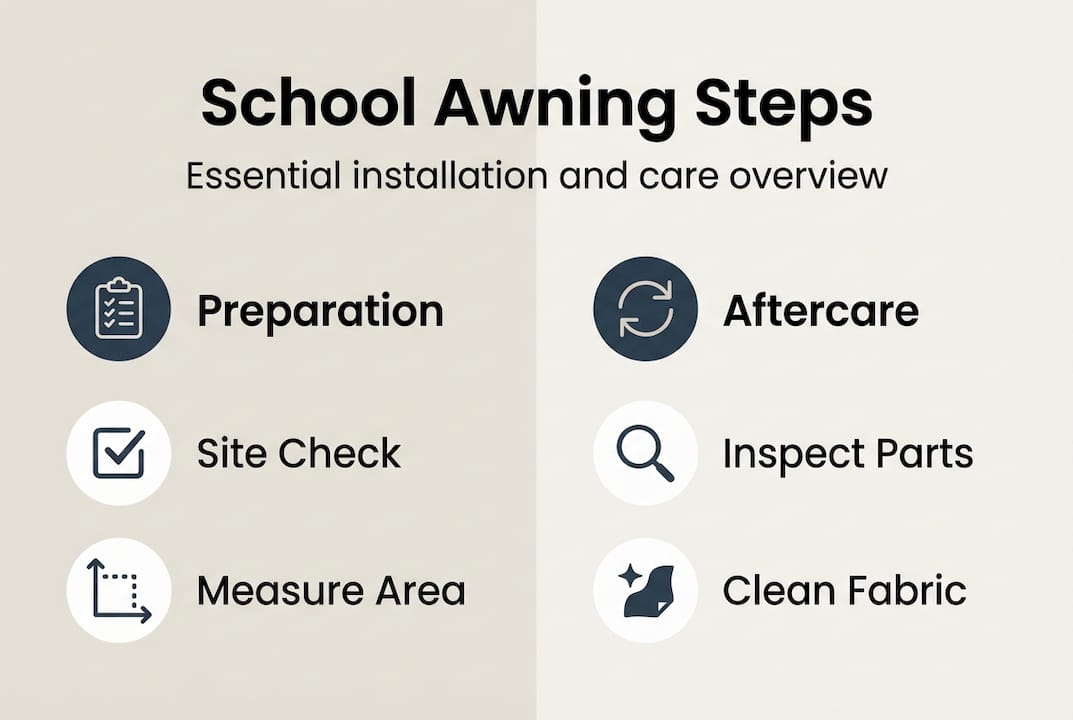
Key Takeaways
Point | Details |
Planning permissions exemptions | The project may be exempt under Class M for structures under 100 square metres and less than 5 metres high if located more than 5 metres from boundaries, but consent is still required in conservation areas or for listed buildings. |
Safety clearances | Commercial school awnings must have a minimum clearance height of 2.4 metres above walkways to prevent head injuries, with particular emphasis on routes and dining areas. |
Site assessment essentials | A thorough site assessment is required to verify the wall structure, materials and suitable anchors before installation begins. |
Professional installation advised | Engaging professionals familiar with Yorkshire awning regulations enhances safety and compliance and helps navigate local variations and Article 4 directions. |
Understanding planning permissions and regulations
Navigating legal requirements prevents costly delays and ensures your school awning project complies with local authority expectations. School awning installations require checking planning permission under Class M permitted development rights, which often exempt structures under 100 square metres, less than 5 metres in height, and positioned more than 5 metres from property boundaries. However, mandatory permissions apply in conservation areas, for listed buildings, or within green belt zones regardless of size.
Commercial awnings installed in school settings must meet specific safety standards, including a minimum clearance height of 2.4 metres above pavements or walkways to prevent head injuries. This becomes particularly important for awnings extending over pupil circulation routes or dining areas. Schools in Yorkshire and surrounding regions must verify whether their local authority has imposed Article 4 directions removing certain permitted development rights, which can affect awning installations near historic sites or designated conservation zones.
Key regulatory considerations include:
Confirming exemption status with your local planning authority before procurement
Obtaining written permission for installations in conservation areas or on listed buildings
Ensuring minimum safety clearances for awnings over walkways (2.4m minimum)
Verifying wind load ratings appropriate for your geographical exposure
Checking building insurance implications for permanent outdoor structures
Regional authorities in Yorkshire, Derbyshire, Nottinghamshire, and Lincolnshire generally follow national planning frameworks, but local variations exist. Firms like Infinity Awnings understand these regional nuances and can advise on compliance before installation begins. Engaging professionals familiar with awning regulations in Yorkshire areas saves time and reduces the risk of enforcement action requiring costly removals or modifications.
With legal requirements clarified, focus shifts to practical preparation and gathering the necessary tools for installation.
Preparing for installation: tools, site assessment, and materials
Thorough preparation determines installation success and longevity. Begin with a comprehensive site assessment examining the mounting wall’s structural integrity, material composition, and load-bearing capacity. Schools often feature brick, concrete block, or rendered exteriors, each requiring specific anchor types. Locate wall studs or structural supports using a stud finder, as mounting brackets must attach to solid framing rather than cavity spaces.
Measure the intended installation area carefully, noting the available width and projection depth. Ideal mounting height ranges from 8 to 12 feet, balancing accessibility for maintenance with adequate clearance for pupils and staff below. Verify the mounting surface is level using a spirit level across the entire span, as uneven walls require shimming or additional preparation to prevent operational issues.
Preparation aspect | Requirement | Notes |
Wall assessment | Check material type, locate studs, verify load capacity | Brick and concrete require different anchor types |
Measurements | Width, projection, mounting height (8-12 feet ideal) | Account for window placement and drainage |
Surface level | Check horizontal alignment across span | Shim uneven areas before bracket installation |
Clearance zones | Minimum 2.4m above walkways | Ensure compliance with safety standards |
Electrical access | For motorised units, verify power supply proximity | Requires certified electrician for school installations |
Essential tools and materials include:
Cordless drill with masonry bits (for brick/concrete) or wood bits (for timber frames)
Spirit level (minimum 1.2m length for accurate alignment)
Tape measure (8m minimum for large installations)
Extension ladder with stabilisers rated for the mounting height
Adjustable wrench and socket set for bracket fastening
Silicone caulk for weatherproofing mounting points
Appropriate anchors: expansion bolts for masonry, lag bolts for timber
Pro Tip: Schedule installation during term breaks when possible. This minimises disruption and allows thorough testing before pupils return, ensuring any adjustments happen without affecting daily operations.
Material compatibility matters significantly in school environments. Vinyl siding requires backing boards to distribute loads, whilst solid brick walls provide excellent anchor points. Installation steps begin with site assessment and planning, checking wall studs, ensuring level surfaces, and confirming appropriate mounting heights between 8 and 12 feet. Schools should also plan awning size according to intended use, whether covering dining areas, playground zones, or outdoor classroom spaces.
Gather all materials before starting work, including the awning unit itself, mounting brackets, fasteners, and any electrical components for motorised systems. Having everything on site prevents delays and allows the installation team to work efficiently without interruption.
With preparations complete, move forward to the actual installation procedure step by step.
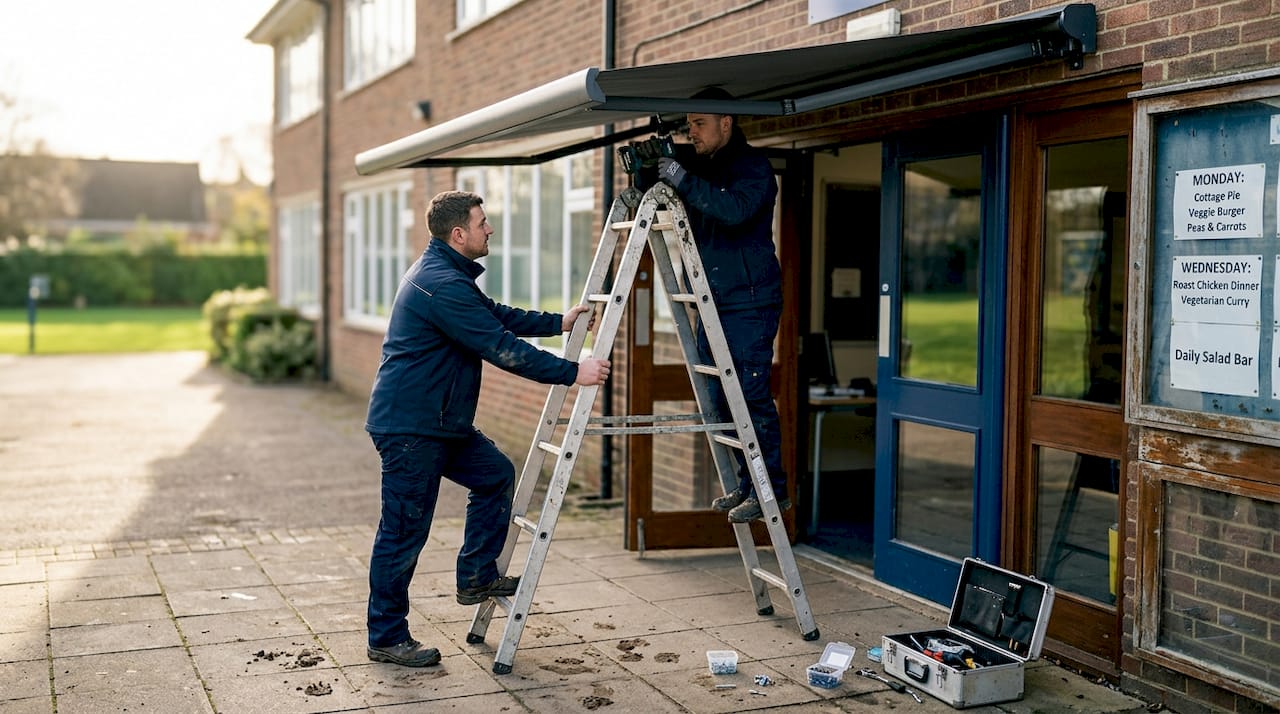
How to install school awnings: step by step guide
Executing the installation requires precision and attention to detail at each stage. Following a systematic approach ensures structural integrity and operational reliability.
Mark bracket positions accurately. Using your measurements, mark the exact locations for mounting brackets on the wall. Space brackets according to manufacturer specifications, typically every 1.5 to 2 metres for larger awnings. Use a spirit level to ensure marks align horizontally across the entire span. Double-check measurements before drilling, as repositioning holes weakens wall integrity.
Drill pilot holes for anchors. Select the appropriate drill bit size for your chosen anchors, typically 10-12mm for expansion bolts in masonry. Drill to the specified depth, usually 75-100mm, ensuring holes remain perpendicular to the wall surface. Clear debris from holes using a brush or compressed air to ensure anchors seat properly.
Secure mounting brackets firmly. Insert expansion bolts or lag bolts through bracket holes into prepared anchor points. Tighten fasteners gradually in a cross pattern to distribute pressure evenly and prevent bracket distortion. Verify each bracket remains level as you tighten, making micro-adjustments before final torquing.
Hang the awning frame on brackets. With assistance, lift the awning frame onto mounted brackets. Most systems feature hooks or slots that align with bracket arms. Ensure the frame seats completely before proceeding. This step requires at least two people for safety and proper alignment.
Fasten frame securely to brackets. Once positioned, secure the frame using provided bolts or locking mechanisms. Tighten all connection points systematically, checking that the frame doesn’t shift during fastening. Apply appropriate torque without over-tightening, which can damage aluminium frames.
Remove protective covers and extend fabric. Strip away packaging materials and protective films from the awning fabric and frame. Carefully extend the awning to its full projection, checking for smooth operation and proper fabric tension. Listen for unusual sounds indicating misalignment or obstruction.
Adjust awning tilt for optimal drainage. Calibrate the pitch angle between 20° and 70°, with 30° representing the ideal compromise for water drainage whilst maintaining adequate headroom. Proper tilt prevents water pooling on fabric, which accelerates wear and creates safety hazards from ice formation in winter.
Test operation thoroughly. For manual awnings, extend and retract multiple times, verifying smooth crank operation without binding. Motorised units require testing all functions including extension, retraction, and any integrated sensors. School awnings with motorised operation require electrical certification for safety, so ensure a qualified electrician verifies all electrical connections meet current regulations.
Pro Tip: Document the installation with photographs showing bracket positions, electrical connections, and final configuration. This reference proves invaluable for future maintenance or warranty claims.
Professional installation by SafeContractor-approved firms handles UK-wide school installations using wind-resistant fabrics and sizes up to 12 by 4 metres. Whilst DIY installation is possible for small units, experts recommend professional installation for schools due to safety considerations and liability concerns. Educational institutions carry unique responsibilities for pupil welfare, making professional expertise a prudent investment rather than an unnecessary expense.
After installation, focus shifts to verification, maintenance, and troubleshooting for optimal long-term performance.
Verifying installation and maintaining your school awning
Post-installation checks confirm proper function and identify potential issues before they escalate. Inspect all mounting points immediately after installation, verifying bolts remain tight and brackets show no movement under load. Apply gentle pressure to the extended awning frame, checking for flex or looseness that might indicate inadequate fastening.
Establish a regular maintenance schedule to preserve awning integrity and extend service life:
Monthly visual inspections checking fabric condition, frame alignment, and mounting point security
Quarterly cleaning using mild soap solution and soft brush to remove dirt, pollen, and organic matter
Bi-annual professional inspections for motorised units, examining electrical components and mechanical systems
Annual deep cleaning addressing stubborn stains and applying fabric protectant if recommended by manufacturer
Storm preparation retracting awnings when winds exceed 25mph to prevent structural damage
Fabric care requires particular attention in school environments where airborne debris and biological matter accumulate quickly. Clean awning fabric with pH-neutral cleaners specifically formulated for outdoor textiles, avoiding harsh chemicals that degrade waterproof coatings. Allow fabric to dry completely before retracting to prevent mildew growth, which creates unsightly stains and unpleasant odours.
Maintenance approach | DIY capability | Professional service |
Routine cleaning | Yes, with proper materials | Deeper clean, protective treatments |
Visual inspections | Yes, monthly checks | Detailed structural assessment |
Minor adjustments | Limited, tension/tilt only | Complete mechanical servicing |
Electrical components | No, requires certification | Full electrical safety testing |
Warranty preservation | May void if improper | Maintains manufacturer coverage |
Comparing DIY versus professional maintenance reveals distinct advantages for each approach. School staff can handle basic cleaning and visual checks, reducing costs whilst maintaining familiarity with equipment condition. However, professional installers offer warranties and post-installation support that protect your investment and ensure compliance with safety standards. Motorised awnings particularly benefit from professional servicing, as electrical components require certified inspection to maintain insurance validity.
Retract awnings during high winds to protect fabric and structural components from excessive stress. Modern units often include wind sensors that automatically retract when conditions become hazardous, but manual systems require staff vigilance. Establish clear protocols for monitoring weather forecasts and retracting awnings before storms arrive.
Periodic inspections should examine:
Mounting bracket tightness and wall anchor integrity
Frame alignment and absence of bending or distortion
Fabric tension, checking for sagging or excessive looseness
Mechanical components including gears, springs, and pivot points
Electrical connections, wiring condition, and motor function for powered units
School canopy installations improve outdoor usability year-round, reducing heat gain during summer whilst providing weather protection in other seasons. These benefits support outdoor learning initiatives and increase available space for dining and recreation. Professional maintenance preserves these advantages, ensuring awnings remain functional and attractive throughout their service life.
Keep detailed maintenance records documenting inspections, cleaning, repairs, and any modifications. This documentation supports warranty claims, demonstrates due diligence for insurance purposes, and helps identify patterns requiring attention. Schools operating multiple awnings benefit from centralised record-keeping that tracks each unit’s condition and maintenance history.
For additional guidance on maintaining outdoor structures, explore awning installation tips covering regional considerations specific to Yorkshire and surrounding areas.
Find professional school awning installers near you
Whilst this guide provides comprehensive installation knowledge, professional expertise ensures compliance, safety, and durability in educational settings. Approved installers understand regional regulations, possess appropriate insurance, and offer warranties protecting your investment. Schools across Yorkshire, Derbyshire, Nottinghamshire, and Lincolnshire benefit from local firms familiar with area-specific planning requirements and weather conditions.
Professional installation eliminates liability concerns associated with DIY approaches, particularly important given schools’ duty of care responsibilities. Certified installers carry public liability insurance covering potential accidents during installation and provide workmanship guarantees addressing defects or failures. These protections prove invaluable when unexpected issues arise, transferring risk from the school to the installation company.
Infinity Awnings serves educational institutions throughout these regions, offering tailored solutions for schools seeking durable outdoor shading. With over 15 years of experience and access to premium brands, professional installers deliver results meeting both aesthetic and functional requirements. Visit Infinity Awnings to request a free quote and discuss your school’s specific needs with experienced specialists who understand the unique demands of educational environments.
Frequently asked questions
How long does it take to install a school awning?
Installation duration varies significantly based on awning size, type, and site complexity. Small retractable units suitable for individual classroom doorways can be installed within 4 to 6 hours by experienced professionals. Larger canopy structures typically require 2 to 5 days depending on size and complexity, with post-mounted systems requiring several weeks of curing time before full use. Professional installers coordinate scheduling to minimise disruption, often working during school holidays or weekends when pupils are absent.
Do school awnings require planning permission in Yorkshire and surrounding areas?
Many school awnings qualify as exempt under permitted development rights if they meet size and height limitations: under 100 square metres, less than 5 metres tall, and positioned more than 5 metres from boundaries. However, conservation areas and listed buildings always require formal planning permission regardless of dimensions. Confirm exemption status with your local planning authority before procurement to avoid enforcement issues requiring costly removal or modification.
Can school staff install awnings themselves?
DIY installation is technically possible for small units, but professionals strongly recommend against self-installation in school settings. Educational institutions face unique liability concerns, and improper installation creates safety risks for pupils and staff. Professional installers provide insurance coverage, warranty protection, and compliance assurance that DIY approaches cannot match. The modest cost savings rarely justify the increased risk exposure schools assume when handling installation internally.
What maintenance is needed to keep school awnings in good condition?
Regular cleaning, periodic inspections of mounting fittings, and retracting awnings during high winds preserve structural integrity and extend service life significantly. Clean fabric quarterly using mild soap and soft brushes, allowing complete drying before retraction to prevent mildew. Schedule professional inspections annually for motorised units, examining electrical components and mechanical systems. Establish clear protocols for storm preparation, ensuring staff retract awnings when wind speeds exceed manufacturer recommendations, typically around 25mph for most residential-grade units.
Recommended
Comments