How to retrofit outdoor shading step by step: UK guide
- Andrew Crookes

- 4 days ago
- 9 min read
TL;DR:
Retrofitting outdoor shading improves comfort, reduces heat, and enhances property appearance in the UK.
Proper site assessment and product selection based on environment and goals are essential for success.
Regular maintenance and understanding wind and climate challenges ensure long-lasting outdoor shading solutions.
Sweltering summer afternoons on a south-facing patio, squinting through glare while your guests retreat indoors. Sound familiar? Across Yorkshire, Derbyshire, Nottinghamshire, and Lincolnshire, countless outdoor spaces sit unused simply because they lack effective shading. Retrofitting a shading solution to an existing structure is one of the smartest investments a homeowner or business owner can make. It boosts comfort, reduces heat inside the property, and adds genuine kerb appeal. This guide walks you through every stage of a successful retrofit, from your first site survey to long-term maintenance, using proven methods that work in real UK conditions.
Table of Contents
Key Takeaways
Point | Details |
Site assessment vital | A professional site evaluation prevents mistakes and ensures optimal shading design for your space. |
Choose appropriate solutions | Select materials and system types that match your exposure, wind, and intended use for the best results. |
Follow proper installation steps | A methodical, stepwise process ensures safety, compliance, and long-term outdoor comfort. |
Plan for maintenance | Regular checks and seasonal adjustments keep your outdoor shading performing year after year. |
Professional help pays off | Expert installation and advice can help you avoid common pitfalls and maximise value from your investment. |
Assessing your outdoor space and setting retrofit goals
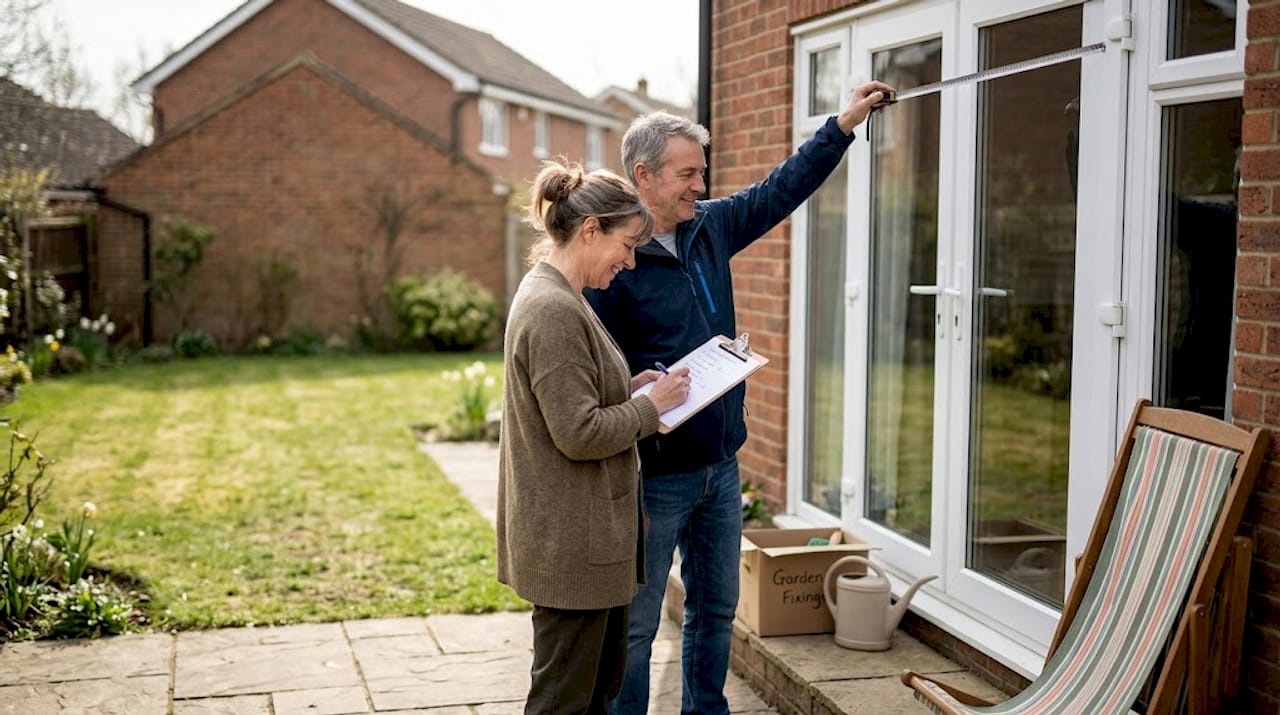
Once you understand the value of what outdoor shading means, the next step is to assess your own space and set clear retrofit objectives.
A proper site survey is not optional. Walk the space at different times of day and note where the sun hits hardest, where puddles form after rain, and whether the structure faces south, east, or west. Take precise measurements of width, projection, and height. These numbers determine every product decision you make from this point forward.
Several environmental factors shape your choices significantly:
Sun angle and orientation: South-facing spaces receive the most intense midday sun and benefit most from overhead fixed or retractable solutions.
Wind exposure: Properties in open countryside across Lincolnshire and the Yorkshire Dales are exposed to strong gusts that rule out lightweight canopy-only products.
Existing structure: Check whether walls, decking joists, or existing fascias can bear the load of a new shading system.
Boundary proximity: No planning permission is usually required if the structure is under 2.5 metres high and at least 2 metres from the boundary, but always verify with your local council.
Setting clear goals matters as much as gathering data. Are you primarily reducing glare for a restaurant terrace, or cutting solar heat gain through patio doors to achieve comfort and energy savings? Write these down before you choose any product.
Goal | Priority metric | Recommended assessment tool |
Reduce glare | Sun angle at peak hours | Compass app and shadow mapping |
Lower interior temperature | Solar heat gain coefficient | Thermal camera or energy bill audit |
Extend usable season | Wind and rain frequency | Local weather data |
Improve aesthetics | Visual sightlines | Photo mockup or design consultation |
Pro Tip: When surveying your space, mark which fixings are going into masonry versus timber, and estimate how often you will need to access those fixings for maintenance. Products that are difficult to service create long-term headaches.
For inspiration on layout possibilities, garden pergola considerations from experienced garden designers can help you visualise realistic outcomes before committing to a system.
Choosing the right shading solution and materials
Now that you have clarified your needs and limitations, you can choose the right shading product and materials for lasting value.
The single most important statistic in this field is often overlooked: external shading reduces solar heat gain by 60 to 85%, while internal blinds and curtains manage only 14 to 37%. That gap is enormous. Fitting shading outside the glazing line is dramatically more effective than any internal solution.
Explore the full range of UK shading types before narrowing your choice. The main categories to consider are:
Retractable awnings: Flexible and compact. Electric models with wind sensors suit exposed properties well.
Fixed pergolas with roofing: Durable and structural. Aluminium frames with polycarbonate or glass infill suit year-round use.
Verandas: Lean-to structures fixed to the house wall, offering the most weather protection.
Freestanding canopies: Useful where wall fixing is not possible, though they require deeper foundations.
Solution | Best orientation | Material | Durability | Cost range |
Retractable awning | South, east/west | Aluminium frame, acrylic fabric | 10 to 15 years | £1,500 to £5,000 |
Fixed pergola | South, hybrid | Powder-coated aluminium | 20 to 30 years | £3,000 to £15,000 |
Veranda | South, south-west | Aluminium, glass or polycarbonate | 20 to 30 years | £5,000 to £20,000 |
Freestanding canopy | Any | Steel or aluminium, fabric | 8 to 12 years | £800 to £4,000 |
Pro Tip: Hybrid solutions that combine a fixed aluminium pergola with a retractable fabric infill panel balance year-round performance with cost. You get solid rain protection in winter and breathable shade in summer without paying for two separate systems.
For practical guidance on matching products to your specific property, the choosing shading tips resource covers common pitfalls clearly.
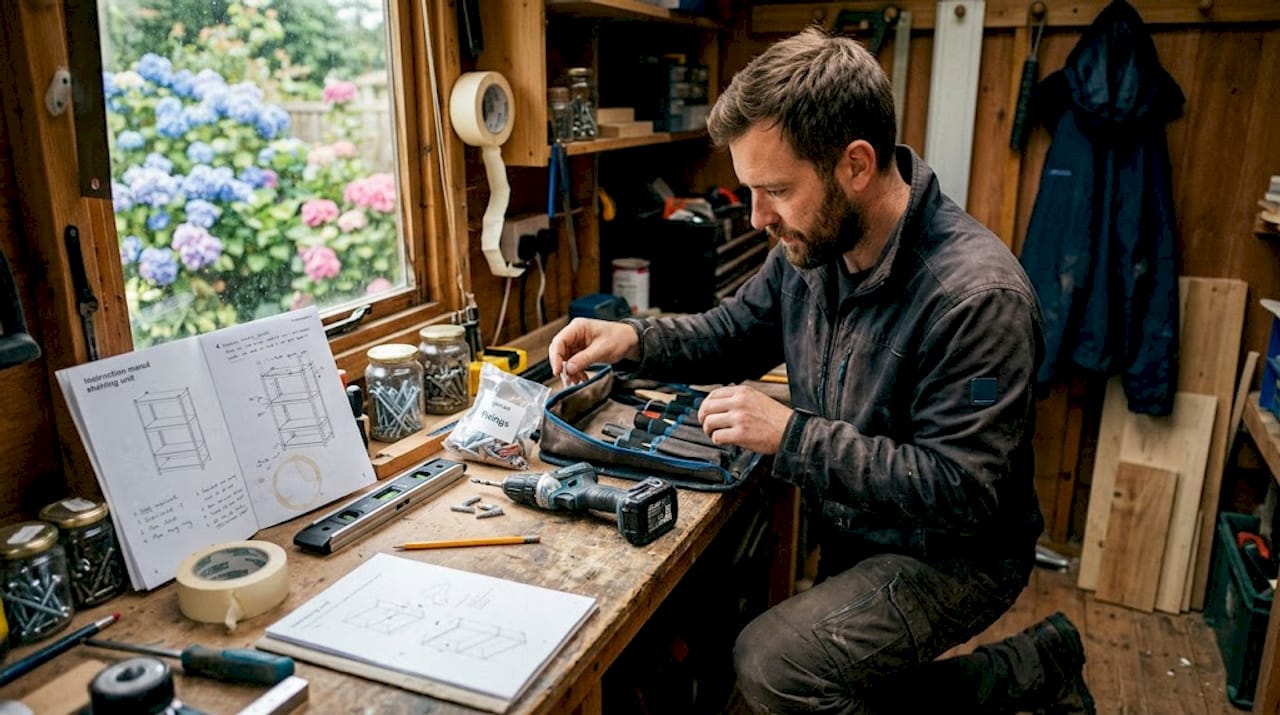
Preparing for a successful retrofit: Essential tools and structural checks
Having selected the optimal shading approach, proper preparation is critical to avoid costly or unsafe errors.
Before any drilling or digging, identify underground services. Gas, water, and electricity cables run beneath many domestic gardens and commercial terraces. Use a cable and pipe detector and contact your utility provider if you are unsure. This step is non-negotiable.
For pergola structure insights and fixing principles, structural preparation follows a clear sequence:
Conduct a full structural survey of walls, posts, and decking subframe.
Measure and mark post hole positions, ensuring equal spacing.
Prepare post foundations. Post depths of 600 to 750mm and correct wind tie use are standard for UK wind conditions.
Mix concrete to the correct ratio and allow a full cure period before loading.
Dry-fit all components before final fixing to check alignment and tolerances.
Tool or material | Purpose | Notes |
Spirit level | Ensure posts and beams are plumb | Digital levels save time on large projects |
Rotary hammer drill | Fix into masonry walls | Use correct SDS bits for brick and block |
Post spanner and torque wrench | Tighten fixings to specification | Under-torquing causes movement in wind |
Concrete and post mix | Foundation for freestanding posts | Allow 24 to 48 hours before loading |
Wind sensor kit | Automatic retraction trigger | Highly recommended for exposed Yorkshire sites |
Safety note: Never fix a shading structure to a deck without first confirming the subframe joist load capacity. Standard decking joists are designed for foot traffic, not the combined dead load and wind uplift of a permanent overhead structure. Always consult a structural engineer if there is any doubt.
For roofing-specific preparation, pergola roofing explanation and the detailed pergola installation guide both cover rafter sizing, pitch requirements, and fixing patterns in depth. If you are fitting corrugated PVC sheets, the PVC sheet installation process specifies correct lap distances and fixing centres.
Step-by-step installation process for outdoor shading
With your materials and structure ready, follow these installation steps for a successful retrofit.
A complete stepwise shading guide recommends this core workflow: site survey, structure check, measure, select product, install (which takes 2 to 8 hours depending on complexity), and schedule maintenance. Do not skip the site survey stage even on straightforward projects.
Mark out the footprint using string lines and stakes. Double-check diagonals to confirm the layout is square.
Fix the wall plate or ledger into masonry using expanding bolts at the specified centres. Check level before tightening fully.
Erect posts or support columns in prepared foundations or onto existing hard standing with base plates.
Fit the main beam or framework and check for level and plumb in all planes.
Attach rafters or awning arms at the correct spacing. For PVC sheet roofing, a 5 degree pitch, rafters no more than 600mm apart, and 1 to 2 corrugation overlaps are standard.
Install the shade element (fabric, glass, polycarbonate, or louvre panels) and secure at all fixing points.
Connect any electrical components (LED lighting, motor, wind sensor) following the manufacturer’s wiring diagram.
Carry out a wind simulation test by pulling the structure firmly in multiple directions and checking for movement at every fixing.
System type | Key installation steps | Typical outcome |
Fixed pergola | Foundation, frame, roofing, electrics | Permanent, year-round shelter |
Retractable awning | Wall plate, arm fitting, fabric tensioning, motor | Flexible sun control on demand |
Pro Tip: If you are in an exposed location such as the Yorkshire Moors or coastal Lincolnshire, fit a wind sensor as part of the initial installation rather than as a later add-on. Retrofitting a sensor after the fact often requires additional cabling runs and can be surprisingly disruptive.
For further shading comfort details and guidance on maximising performance from your chosen product, our dedicated resource covers orientation, projection depth, and fabric selection in detail.
Verifying, adjusting, and maintaining your new shading solution
Proper installation isn’t the end. Ongoing checks and maintenance ensure your investment delivers comfort year after year.
Once installation is complete, run through a thorough post-install verification before declaring the project finished:
Check all fixings are torqued to specification and none have shifted during assembly.
Confirm the shade element sits level with no sag or twist in the fabric or panels.
Operate any motorised system through its full range of travel and listen for unusual sounds.
Test the wind sensor response by simulating high-speed air movement and confirming auto-retraction triggers correctly.
Inspect guttering or drainage channels on roofed structures to confirm water flows away from the building.
Measure shade coverage at midday to confirm the projection depth meets your original goal.
For long-term performance, maintenance is a key stage of the shading lifecycle, and the payback period for cooling savings typically spans 10 to 15 years. Protecting your investment through consistent aftercare directly affects that return.
Seasonal adjustments matter in the UK climate. Retractable systems should be fully closed during winter storms and left partially extended on mild sunny days to take advantage of low-angle winter sun. Sensor calibration should be checked each spring as temperature fluctuations can affect sensitivity thresholds.
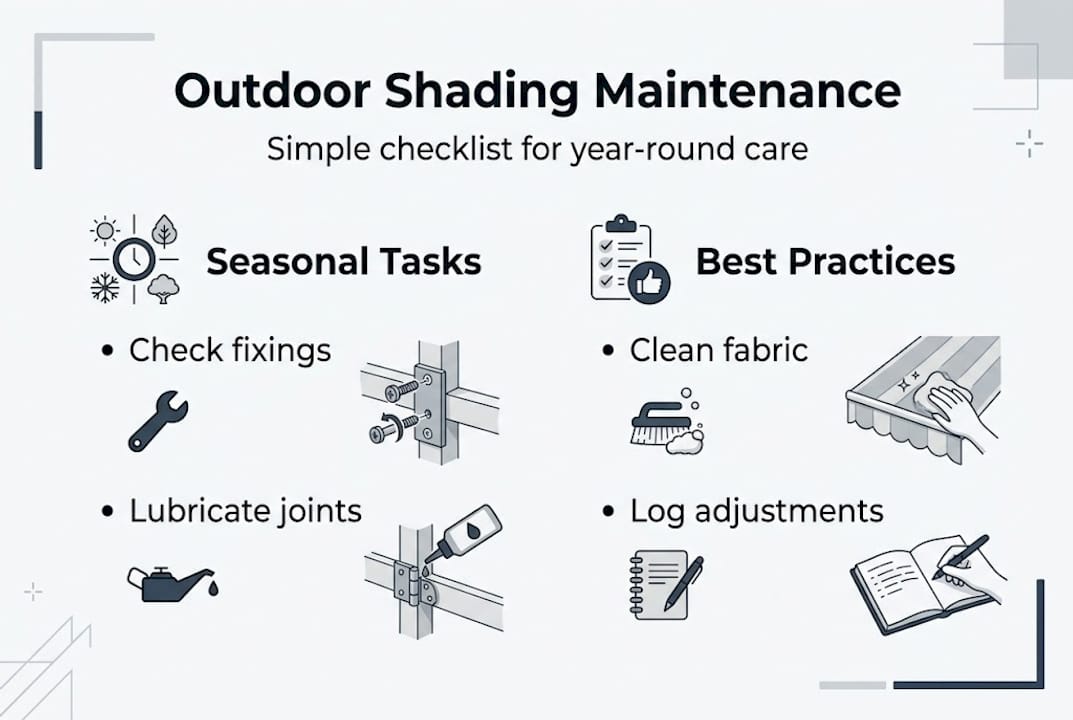
Pro Tip: Keep a simple maintenance log, even just a notes file on your phone. Record the date of each check, any fixings tightened, and the condition of fabric or panels. Adjust tension hardware on retractable awnings every six months to prevent premature wear on the cassette mechanism.
Review the ongoing shading benefits periodically to remind yourself how well-maintained shading continues to contribute to energy efficiency and outdoor comfort across every season.
What most guides miss about retrofitting outdoor shading in the UK
Most online retrofit guides are written for mild southern European climates or idealised UK conditions that rarely exist north of Nottingham. The reality for homeowners across Yorkshire, Derbyshire, and Lincolnshire is far more demanding.
Wind is the factor most consistently underestimated. A pergola that performs flawlessly in a sheltered Surrey garden can flex, creak, and ultimately fail within two seasons on an exposed West Yorkshire hillside. Choosing a product rated to the correct wind load category for your specific location is not a technicality. It is the difference between a 20-year investment and a costly repair bill.
One-size-fits-all systems also ignore the rapid daylight variation in this latitude. Adjustable and retractable products that adapt across the seasons earn their premium cost back quickly. Planning for sensor and automation add-ons from the very first design stage avoids expensive revisits later.
Perhaps the least discussed issue is aftercare. Many customers treat installation as the finish line. In reality, a shading system without annual maintenance is steadily losing its design-rated performance. Understanding regional climate considerations for the North of England should shape not just product selection but your ongoing maintenance plan from day one.
Enhance your outdoor space with smart shading from Infinity Awnings
At Infinity Awnings, we have spent over 15 years helping homeowners and businesses across Yorkshire, Derbyshire, Nottinghamshire, and Lincolnshire transform their outdoor spaces with shading that works in real UK conditions.
Whether you are drawn to the clean lines of modern pergola options or the weather-tight protection of our veranda solutions, we handle the entire process from design and site survey through to installation and aftercare. Our team understands local planning requirements, regional wind conditions, and the specific demands of properties across the North and Midlands. If you are ready to stop putting up with an unusable outdoor space, get a free quote and let us design a solution built specifically for your property.
Frequently asked questions
Do I need planning permission to retrofit outdoor shading in the UK?
In most cases, planning permission isn’t required if your shading is under 2.5 metres high and at least 2 metres from your property boundary, but always confirm with your local council before starting work.
How much energy can outdoor shading save?
External shading reduces solar heat gain by 60 to 85% and may lower cooling energy use by 5 to 30%, making it one of the most effective passive improvements available.
How long does it take to install outdoor shading retrofits?
Professional installation takes 2 to 8 hours depending on the complexity of the system, site conditions, and whether electrical components such as motors or sensors are included.
What are common mistakes when retrofitting outdoor shade?
Skipping structural checks, underestimating wind forces on exposed sites, and selecting fixed systems with no adjustment capability are the most frequent and costly errors.
Can I use shading on heritage or listed properties?
Heritage and listed buildings often require sympathetic materials, reversible fixing methods, and prior consent from your local planning authority, so always seek specialist advice before proceeding.
Recommended
Comments