
Improving patio comfort: steps that actually work

TL;DR:
Most patios remain underused due to overlooked discomforts rather than poor taste, such as poor layout, sun exposure, and seating issues. Proper assessment, strategic planning, ergonomic furniture, layered lighting, and finishing touches transform outdoor spaces into functional, comfortable rooms. Professional shading installations further enhance usability, completing a deliberate, layered approach to patio improvement.
Your patio has more potential than it’s delivering right now. Most outdoor spaces sit underused not because of bad taste, but because of overlooked discomforts: the sun hits the wrong spot, the seating feels stiff after twenty minutes, or the layout makes the space feel like a corridor rather than a room. Improving patio comfort steps through a structured process, rather than buying a single new piece of furniture and hoping for the best, is what separates patios people live in from patios people glance at through the kitchen window.
Table of Contents
Key takeaways
Point | Details |
Assess before you spend | Map your patio’s problem areas and measure the space before purchasing anything new. |
Spatial planning matters most | Keep walkways at least 36 inches wide and leave 24 inches of clearance around seating to avoid cramped arrangements. |
Furniture ergonomics drive real comfort | Seat height of 16 to 18 inches and a back pitch of 100 to 110 degrees keeps guests comfortable for hours. |
Shade and lighting work together | Retractable awnings and layered warm lighting extend patio usability across seasons and times of day. |
Layer finishing touches last | Rugs, cushions, throws, and side tables complete the comfort picture once structure and furniture are sorted. |
Improving patio comfort: assess before you act
Rushing to buy new furniture before understanding what is actually wrong with your patio is the single most common mistake homeowners make. Spend one afternoon walking the space at different times of day. Note where the sun becomes unbearable, where pooling water collects after rain, where foot traffic naturally wants to flow, and which seats nobody gravitates towards.
What to assess:
Where direct sunlight falls between 11am and 4pm
Whether existing seating faces a pleasant view or a fence panel
How guests move through the space during gatherings
Any surfaces that are uneven, slippery, or awkward to navigate
Whether there is adequate storage for cushions and accessories
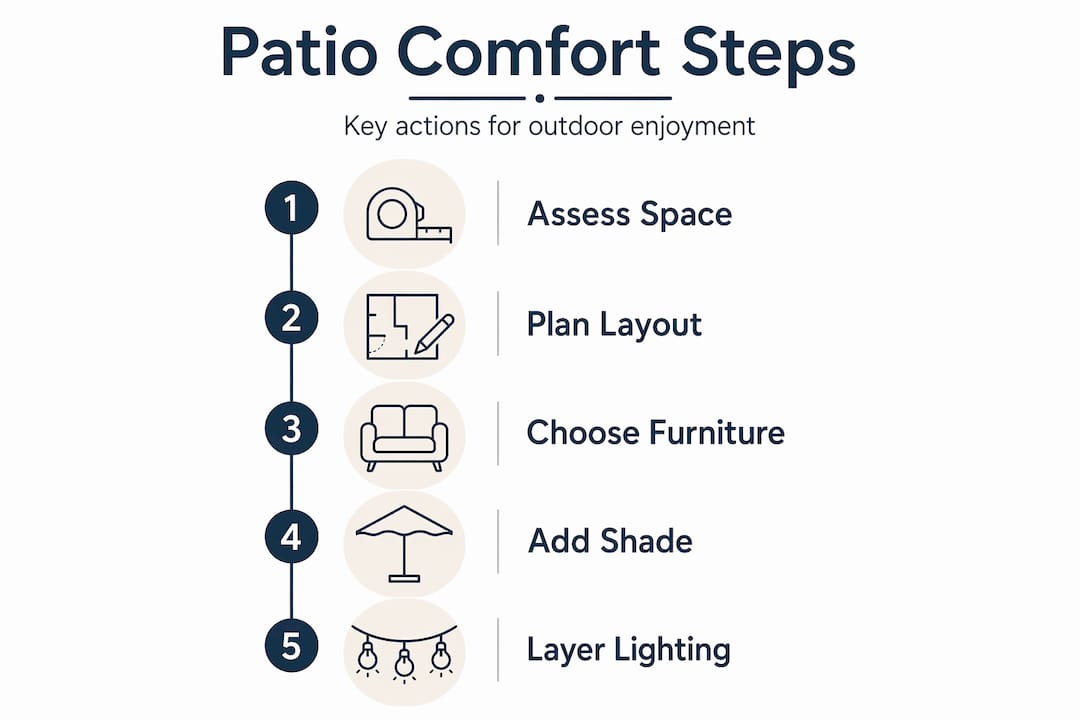
Once you have observed the space, measure it properly. You will need the total dimensions, the location of doors and windows, and the position of any fixed structures like walls or raised beds. Sketch a rough floor plan, even on paper. This single step stops you ordering a corner sofa that blocks the only access door.
Pro Tip: Take photos at different times of day and annotate them with problem areas. This gives you a reference point when shopping for solutions and prevents impulse purchases that look good in a showroom but solve nothing at home.
When planning your home improvement sequence, treat patio assessment as a prerequisite rather than an afterthought. The assessment stage also tells you whether you need professional input for structural work, such as installing a pergola or laying new decking, before you commit to furniture and accessories.
Layout and flow: the spatial planning steps
Most patios feel uncomfortable because the layout has never been thought through. Furniture gets placed wherever it fitted when it arrived, and nobody questions it again for years.
Follow these steps to sort the layout properly:
Clear the space completely. Remove all furniture and accessories. Stand in the empty space and identify the natural entry and exit points.
Mark your walkways first. Clear walkways need at least 36 inches of width, and seating arrangements require 24 inches of clearance on all sides. Mark these paths with chalk or tape before placing anything.
Define your zones. Divide the patio into functional areas: a dining zone, a lounging zone, and a social or social zone if space allows. Even a small patio benefits from this distinction because it gives each area a purpose.
Place the largest pieces first. Position your main table or sofa as the anchor of each zone, then build outward.
Layer rugs and plants to separate zones. Rugs and layered lighting visually anchor each zone and create the sense of separate outdoor rooms without physical barriers. An outdoor rug under the lounging furniture immediately signals that this area is for relaxing, not walking through.
Check sightlines from seating positions. Sit in every chair and evaluate what you see. Adjust furniture until the views are pleasant and the space feels open rather than enclosed.
Walk every route. Move through the space as a guest would, carrying a plate or a drink. If anything feels awkward, adjust it now.
Pro Tip: Scale is the detail most people ignore. A small bistro table looks perfectly proportioned in a shop, but on a large patio it looks adrift. Use masking tape on the ground to mark out the footprint of proposed furniture before you buy it.
Good spatial planning also means thinking about patio accessibility for all ages and mobility levels. Wide walkways and stable, level surfaces make a patio genuinely usable for everyone, not just the able-bodied.
Choosing comfortable patio furniture that lasts
Aesthetics sell outdoor furniture. Ergonomics determine whether anyone actually sits in it for more than ten minutes.
The numbers that matter most: optimal lounge seating requires a seat height of 16 to 18 inches and a back pitch of 100 to 110 degrees. These dimensions support a natural, relaxed posture for extended use. Most budget garden chairs sacrifice the back pitch to save material, leaving you upright and tense rather than at ease.
Key furniture criteria for UK patios:
Cushion cores matter. Quick-dry foam cushions with reticulated foam cores prevent moisture trapping and mildew, which is not optional in British weather. Check the cushion specification before buying.
Seat depth counts. Deep seating proportions with thick cushions and appropriate arm heights replicate indoor relaxation levels outdoors. If you can sit fully back in a chair with your feet on the ground, the depth is right.
Material performance over appearance. Powder-coated aluminium and solution-dyed acrylics outperform painted steel and cotton in wet climates. Prioritising material performance over looks saves money over a three to five year period because the furniture simply lasts longer.
Flexibility through modularity. Modular or stackable pieces let you reconfigure the space for different occasions without buying additional furniture.
Furniture feature | What to look for | What to avoid |
Seat height | 16 to 18 inches | Under 14 inches or over 20 inches |
Back pitch | 100 to 110 degrees | Fully upright backs |
Cushion core | Reticulated quick-dry foam | Solid foam or cotton wadding |
Frame material | Powder-coated aluminium | Untreated steel or painted wood |
Flexibility | Modular or stackable | Fixed, oversized sectionals on small patios |
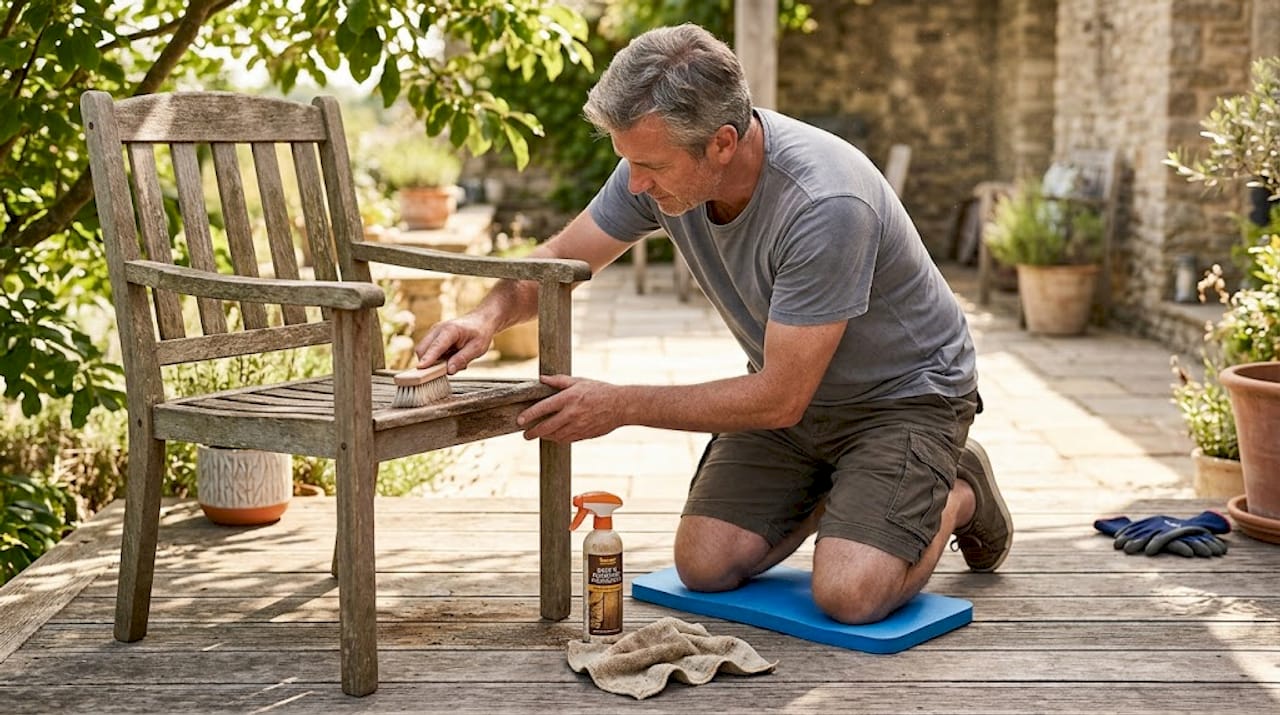
Regular cleaning and applying protective treatments extends outdoor furniture life considerably, preserving both comfort and appearance through Yorkshire winters and Lincolnshire wet summers alike.
Shade and lighting: the comfort multipliers
A well-furnished patio with no shade is unusable on the average British summer afternoon. And a patio with no lighting becomes deserted the moment the sun drops. These two elements extend the hours your outdoor space is genuinely comfortable.
Shade options, ranked by adaptability:
Retractable awnings. The most flexible option. They extend when you need them and retract when you want sun or need to let wind pass through. Infinityawnings provides guidance on choosing the right awning for UK patios, covering fabric, operation type, and sizing.
Pergolas with roofing panels. Provide permanent shade and a defined outdoor room structure. Best for larger spaces where a fixed structure adds value.
Shade sails. Affordable and stylish, but require a 10 to 20 degree slope for proper water runoff. A flat shade sail collects rainwater and sags badly.
Outdoor curtains. Excellent for blocking late-afternoon sun at the sides of a space while maintaining an open feel.
For lighting, the approach that works is layering rather than a single overhead source. Warm bulbs rated 2200K to 2700K at multiple heights create atmosphere that single floodlights never achieve. The practical details: string lights work best with a 12-inch sag and 24 to 36 inch attachment spacing, while pathway lights rated at 50 to 100 lumens spaced three to six feet apart define edges and keep routes safe after dark.
Lighting type | Recommended spec | Best use |
String lights | 2200K to 2700K, 12-inch sag | Overhead canopy atmosphere |
Pathway lights | 50 to 100 lumens, 3 to 6 feet apart | Edge definition and safe routes |
Lanterns | Warm white, battery or solar | Tabletop focal points |
LED awning strips | Dimmable warm white | Integrated under-canopy illumination |
For integrated lighting under an awning canopy, LED awning lighting delivers a clean, built-in solution that avoids the tangled-cable problem of retrofitted string lights.
Finishing touches and final checks
The structural work is done. The furniture is in place. Now the finishing layer is what transforms a comfortable patio into one that genuinely feels like an outdoor room.
The finishing checklist:
Outdoor rugs with pads. Place rugs beneath seating zones with a non-slip underpad that allows airflow. This prevents moisture build-up on the underside and keeps the rug in place. A rug that moves when you sit down is more irritating than no rug at all.
Throws and cushions. Keep a basket or storage bench stocked with outdoor throws for cooler evenings. These signal to guests that the space is designed to be used, not just admired.
Side tables at every seat. A comfortable seat with nowhere to put a drink is an incomplete seat. Aim for one side table per two seating positions at minimum.
Clear access paths at night. Walk your patio after dark before hosting anyone. Identify any steps or level changes that need additional lighting.
Pro Tip: The final test is simple: sit in the space alone for twenty minutes with no task to complete. If you feel genuinely at ease and have no urge to move or adjust anything, the space is working. If something nags at you, that feeling is worth listening to.
Zoning through rugs and lighting transforms even a modest patio into a fully functional outdoor room. The finishing touches are not decoration. They are the final layer of a deliberate, step-by-step process.
My honest take on patio transformations
I’ve watched homeowners spend substantial amounts on a new patio sofa set, position it where the old furniture sat, and wonder why the space still doesn’t feel right. The furniture was never the problem. The layout was.
In my experience, spatial planning is the most underestimated part of any patio improvement. People are comfortable measuring their living room before buying a sofa, but they eyeball their patio and hope for the best. That gap between how carefully we plan indoors versus outdoors is where most patio discomfort originates.
What I’ve also learned is that one big upgrade rarely solves everything. The patios that genuinely work are the ones where someone has layered multiple smaller improvements: the seating is ergonomic, the shade covers the right zone at the right time, the lighting works at 9pm as well as at 6pm, and the accessories make the space feel lived-in rather than staged. None of those individual elements is particularly expensive or complicated on its own. The difference is attending to all of them rather than just one.
Flexible furniture is worth more than statement furniture, every time. A modular arrangement you can reconfigure for a dinner party or a quiet morning with a book will be used. A dramatic fixed sectional that only works for one configuration will gradually feel like a compromise. Small details, such as a side table, a throw, a well-placed lantern, change how a space feels in ways that are disproportionate to their cost.
— Andrew
Transform your patio with professional shading
The steps in this guide take your patio a long way. But there is a point where professional shading makes a difference that no DIY accessory can replicate.

At Infinityawnings, we design and install pergolas, retractable awnings, and verandas across Yorkshire, Derbyshire, Nottinghamshire, and Lincolnshire. Our pergola installations are built to handle British weather properly, providing UV protection, rain coverage, and a structural framework that makes your patio usable in conditions that would otherwise send everyone inside. Paired with the spatial planning, furniture, and lighting steps in this guide, a professionally fitted pergola or awning completes the transformation. Request a free quote and see what your outdoor space could genuinely become.
FAQ
What is the ideal walkway width for a comfortable patio?
Maintain at least 36 inches for main walkways and 24 inches of clearance around seating areas. These dimensions prevent cramping and allow guests to move freely without disrupting anyone seated.
What seat height is best for outdoor lounge furniture?
A seat height of 16 to 18 inches combined with a back pitch of 100 to 110 degrees provides the most comfortable position for extended outdoor relaxation. Most budget chairs do not meet this specification, so check before buying.
How do I stop patio cushions going mouldy in wet weather?
Choose cushions with reticulated, quick-dry foam cores rather than solid foam or cotton fillings. These allow water to drain and air to circulate, preventing the moisture trapping that leads to mildew in British conditions.
What angle should a shade sail be installed at?
Shade sails need a slope of 10 to 20 degrees to allow rainwater to run off properly. A flat installation causes pooling that stresses the fixings and stretches the fabric out of shape.
How do I create a cosy patio atmosphere with lighting?
Use layered lighting with warm white bulbs rated between 2200K and 2700K at multiple heights: string lights overhead, pathway lights at ground level, and lanterns on tables. This approach creates warmth and depth that a single overhead light source cannot achieve.
Recommended
Comments