Veranda planning guide for UK homeowners
- Andrew Crookes

- Jun 8
- 9 min read
TL;DR:
A veranda extends your living space outdoors, offering shelter and comfort while boosting your home’s value with proper planning. Ensuring compliance, selecting durable materials, and following a disciplined build sequence are critical for lasting quality and safety. Regular maintenance, drainage planning, and professional guidance on key structural details further enhance the veranda’s longevity and functionality.
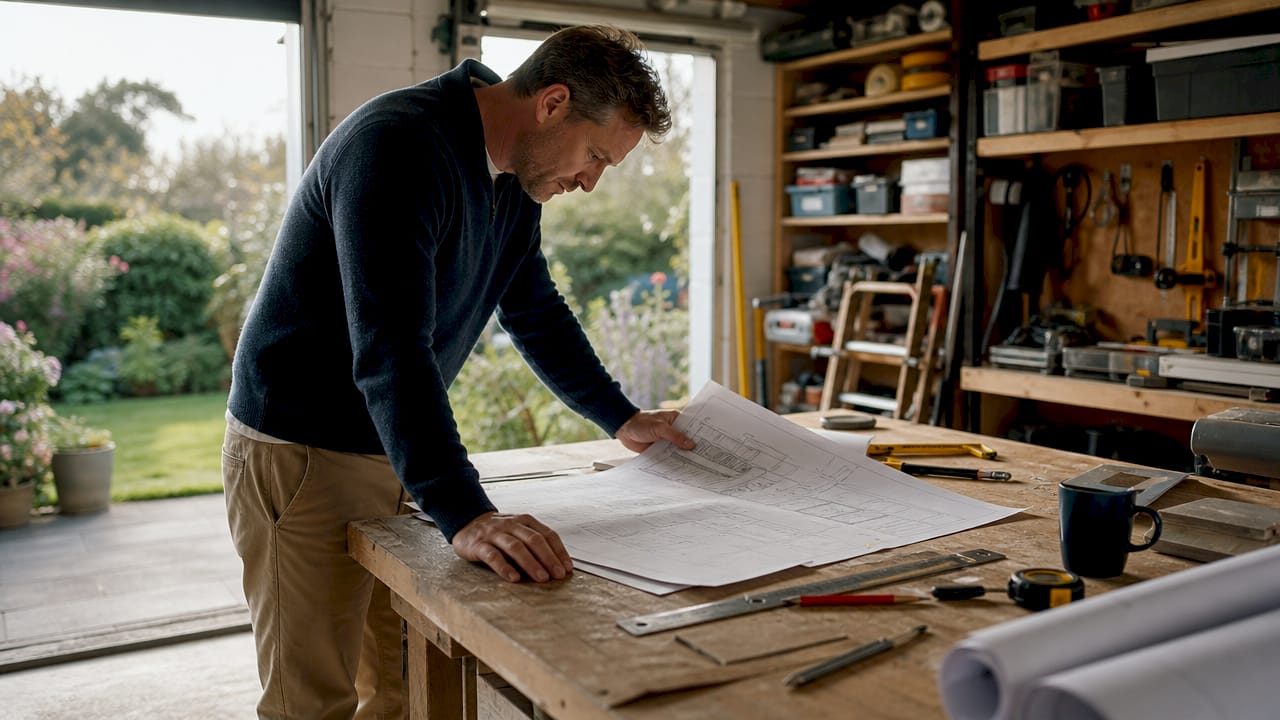
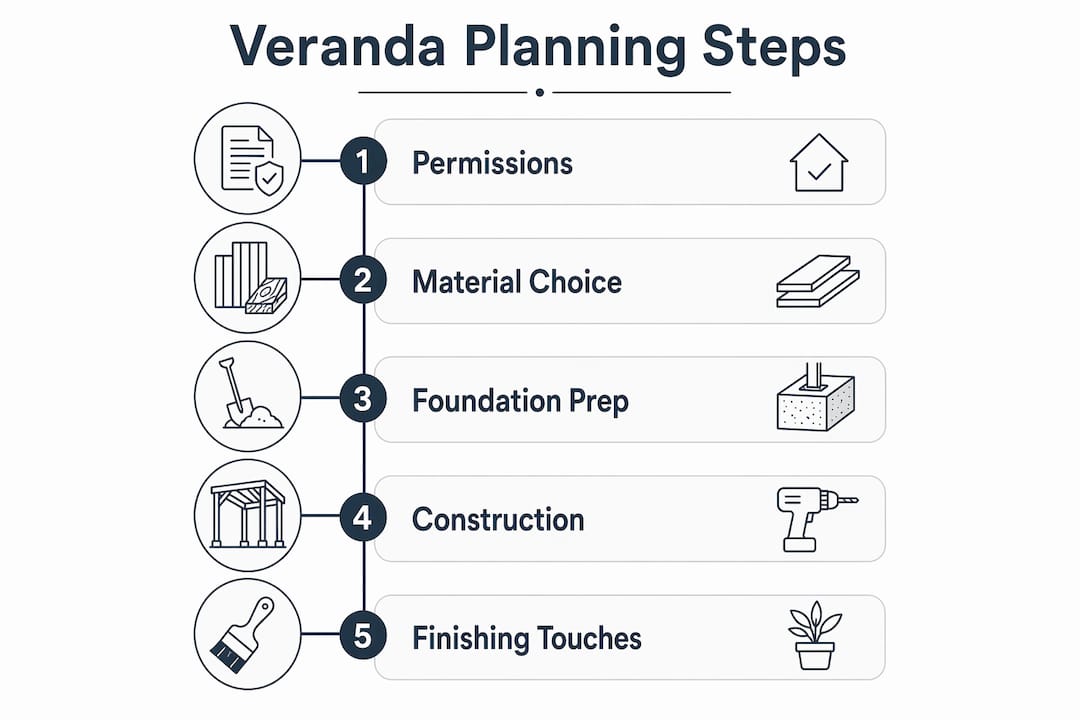
A veranda is a covered outdoor structure attached to your home that extends your living space into the garden, providing shelter from rain and harsh sunlight while creating a comfortable area for dining, relaxing, or entertaining. Planning one correctly from the outset, using a solid veranda planning guide, saves you from costly mistakes, planning disputes, and structural failures that plague rushed builds. The key decisions cover permissions, materials, construction sequence, and layout. Get these right, and your veranda will add genuine value and usability to your home for decades.
What planning permissions and regulations must you consider?
Planning permission is the first thing to resolve, not an afterthought. Permitted development rights allow homeowners in England to build a veranda without formal planning consent, provided the structure is single-storey, reaches no more than 4 metres in height (or 3 metres if within 2 metres of a boundary), covers no more than 50% of the surrounding land, and does not face a highway. These limits are strict, and exceeding any one of them triggers a full planning application.
Several circumstances remove permitted development rights entirely. Listed buildings, properties in conservation areas, and some new-build estates with Article 4 directions all require consent regardless of size. Your local council’s planning portal is the most reliable place to check your specific property’s rights. A quick pre-application enquiry with the planning department costs little and can prevent an enforcement notice later.
Common reasons verandas require full permission include:
The structure covers more than half the garden’s total area
It sits forward of the principal elevation, facing a road
The property is in a designated area such as a National Park or Area of Outstanding Natural Beauty
The roof height exceeds the permitted limits near a shared boundary
Pro Tip: Before drawing up any design, download your local council’s householder planning guidance and cross-reference it with the national permitted development rules. Discrepancies between the two are common, and the more restrictive rule always applies.
How do you choose the best materials and design for your veranda?
Material choice determines how long your veranda lasts and how much maintenance it demands. Pressure-treated softwood is the most common frame material for UK builds because it balances cost, workability, and weather resistance. Hardwoods such as oak or iroko offer superior durability and a premium appearance but cost significantly more and require specialist fixings. Aluminium frames have grown in popularity because they are rot-proof, low-maintenance, and available in powder-coated colours to match any property.
Roof material is where many homeowners make their biggest mistake. The three main options each suit different priorities:
Roof type | Strengths | Weaknesses |
Polycarbonate | Lightweight, affordable, lets in light | Can yellow over time, less thermally efficient |
Glass | Premium look, excellent clarity | Heavy, expensive, requires stronger frame |
Solid (felt, EPDM, or tiles) | Best insulation, most durable | Blocks natural light, higher build cost |
For polycarbonate roofing specifically, C24 construction timber provides the frame strength needed to carry the load without deflection, and gasket strips with flashing tape at wall and roof junctions prevent the leaks that are the most common complaint in DIY polycarbonate builds.
Design considerations go beyond aesthetics. Roof pitch matters enormously in the UK climate. A pitch of at least 5 degrees is the minimum recommended for adequate water runoff on a veranda roof. Anything shallower causes pooling, which accelerates material degradation and risks leaks. Post placement should balance visual openness with structural necessity. Wider spans between posts look elegant but demand larger section beams to prevent sagging.
For design inspiration, popular veranda styles range from the classic Victorian timber veranda with decorative fascia boards to the contemporary aluminium and glass structure that suits modern extensions. Matching your veranda’s style to your property’s architecture makes the addition feel intentional rather than bolted on.
Pro Tip: Order a small sample of your chosen roofing material and hold it up against your house in different light conditions before committing. Polycarbonate tints and glass coatings look very different on a product sheet compared to in situ against brick or render.
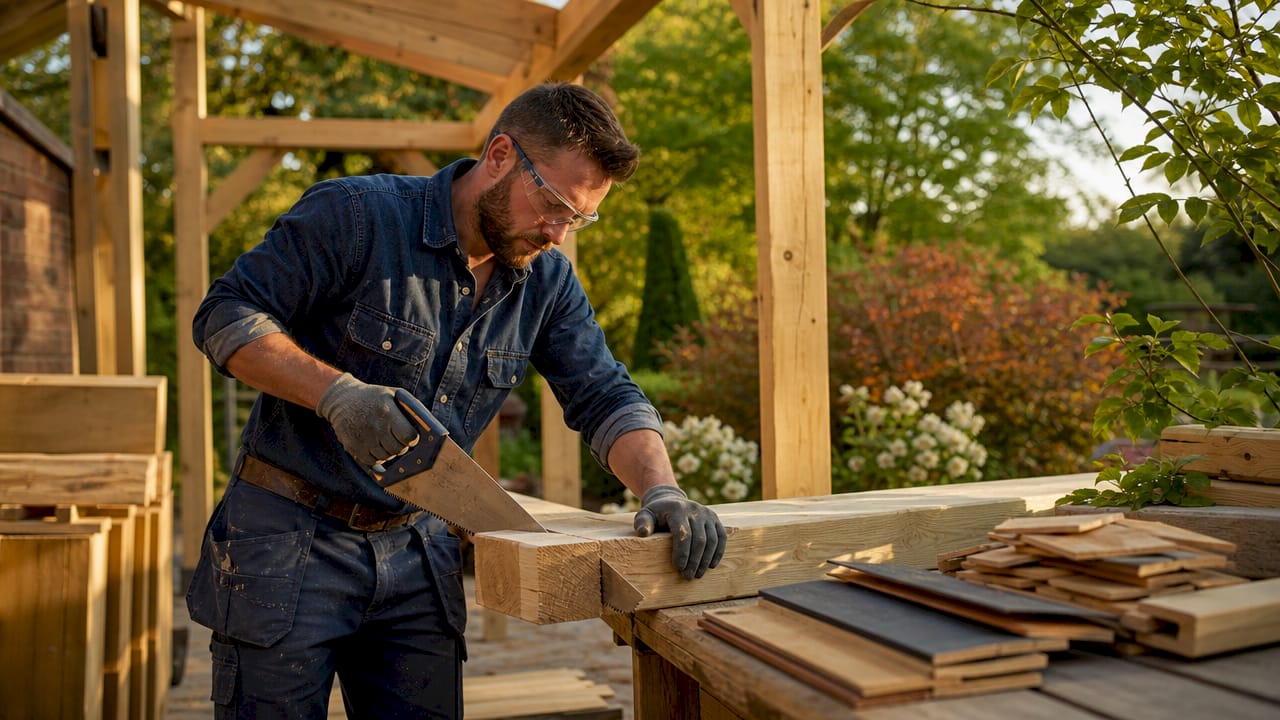
What are the step-by-step construction essentials?
A correct build sequence is not optional. Skipping steps leads to leaning posts and twisted roof lines that are expensive to correct once concrete has set. Follow this sequence without shortcutting:
Set out the footprint. Use string lines and a builder’s square to mark the exact perimeter. Check diagonals are equal to confirm square corners before digging anything.
Build foundations. Dig post holes to the depth your soil type requires, typically 600mm minimum in stable ground. Line the base with gravel for drainage before pouring concrete.
Install posts. Set each post in wet concrete, check vertical with a spirit level on two adjacent faces, and brace temporarily with timber props. Allow concrete to cure fully before removing bracing or adding any load. In practice, this means waiting at least 48 hours in warm weather and up to 7 days in cold conditions.
Fix the wall plate. This horizontal timber carries the roof load back to the house. Fix it into structural masonry, not render or cladding. Use expanding bolts at 600mm centres and check it is perfectly level before proceeding.
Install beams and rafters. Beams span between posts and the wall plate. Rafters sit on top, spaced to suit your roofing material. Mark rafter positions on both the beam and wall plate before cutting, so spacing is consistent throughout.
Fit the roofing. Work from the lowest point upward. Overlap sheets or tiles correctly, seal all junctions with appropriate flashing, and fit gutters and downpipes before considering the roof finished.
The table below summarises the critical checks at each stage:
Stage | Critical check |
Footprint | Diagonals equal; string lines level |
Foundations | Gravel drainage layer present; hole depth correct |
Posts | Plumb on two faces; braced until concrete cures |
Wall plate | Fixed into masonry; perfectly level |
Roofing | All junctions sealed; gutters fitted and fall correct |
Drainage must be planned from day one, with gutters and downpipes directing water well away from post bases. Timber posts sitting in pooled water will rot within a few years regardless of how well they were treated at installation.
Pro Tip: Hire a laser level for the wall plate fixing stage. A wall plate that is even 5mm out of level will cause every rafter to sit at a slightly different angle, making the finished roof look uneven and creating low spots where water collects.
How should you plan the layout and finishing touches?
Layout planning shapes how usable your veranda actually feels day to day. Post spacing directly affects the sense of openness. Spans of up to 3 metres between posts are achievable with standard 100x100mm timber, but wider spans require either larger section posts or intermediate support. A veranda layout that prioritises a clear central zone for a dining table, with posts positioned at the perimeter, gives you the most flexible outdoor living space.
Roof overhang beyond the posts is worth planning carefully. An overhang of 300 to 600mm on the open sides sheds rain away from the seating area and protects the post bases from direct rainfall. Pair this with a gutter on the front beam and a downpipe at each corner, and you have a structure that manages UK rainfall without saturating the ground around your foundations.
Finishing touches that genuinely extend the veranda’s lifespan include:
Sealing all end grain cuts with a quality preservative immediately after cutting, before any timber goes into position
Applying a UV-resistant exterior stain or paint system to all exposed timber within the first season
Fitting stainless steel or hot-dipped galvanised fixings throughout, since standard zinc-plated screws corrode within two to three years outdoors
Scheduling an annual inspection to check fixings, sealant joints, and any signs of timber movement or rot
For electrical additions such as outdoor lighting or sockets, Part P regulations require that work meets BS 7671 standards, including RCD protection and appropriate IP ratings for outdoor use. Notifiable work must be registered through a competent person scheme. This is not an area to cut corners on, both for safety and for insurance purposes.
Timber treatment and regular maintenance extend the life of veranda materials significantly against the wear of UK weather. Minor issues caught during an annual check, such as a loose fixing or a hairline crack in sealant, cost almost nothing to fix. Left for two or three seasons, the same issues can mean replacing structural members.
Pro Tip: Fit a drip edge or metal flashing along the wall plate junction before the roofing goes on. This single detail prevents the most common source of water ingress in timber-framed verandas and adds almost nothing to the build cost.
Key takeaways
A well-planned veranda requires confirmed permissions, correct material selection, and a disciplined build sequence to deliver lasting outdoor comfort.
Point | Details |
Confirm permissions first | Check permitted development limits before designing, to avoid enforcement issues. |
Match materials to climate | Use pressure-treated timber or aluminium frames with a minimum 5-degree roof pitch for UK conditions. |
Follow the build sequence | Set out, foundations, posts, wall plate, beams, then roofing. Never skip or rush stages. |
Seal and maintain regularly | Treat end grain cuts, use galvanised fixings, and inspect annually to prevent costly repairs. |
Plan drainage from day one | Gutters, downpipes, and roof slope must be integrated into the design before construction begins. |
What I have learned from years of veranda projects
Most homeowners come to us having already sketched out a design they love. That enthusiasm is great, but the projects that go smoothly are always the ones where the homeowner started with permissions and drainage, not with aesthetics. I have seen beautifully designed verandas that had to be partially demolished because they fell foul of a boundary height rule the owner had not checked. That is an expensive and demoralising outcome that a single phone call to the local planning department would have prevented.
The step I see most often rushed is the concrete curing time. People pour the post foundations on a Saturday and want to start building on Sunday. The concrete looks set, but it has not reached working strength. The result is posts that shift fractionally as the roof load goes on, and a structure that never sits quite right. Patience at the foundation stage pays back every time.
My honest advice for anyone weighing up a DIY build versus professional installation is this: the materials and the sequence are learnable, but the structural details, particularly the wall plate fixing and the roof junction sealing, are where DIY builds most commonly fail. Getting a professional to at least check those two elements, even if you do the rest yourself, is money very well spent. For homeowners who want a structure that performs reliably for 20 years rather than 10, the benefits of professional veranda installation are difficult to argue against.
— Andrew
Explore veranda and pergola solutions with Infinityawnings
If you are ready to move from planning to reality, Infinityawnings has been designing and installing outdoor structures across Yorkshire, Derbyshire, Nottinghamshire, and Lincolnshire for over 15 years. The team works with premium brands including Weinor, Tarasola, and Morvelle to deliver verandas and pergolas that are built for UK weather and tailored to your property.

Whether you want a fully installed structure or expert guidance before you build, Infinityawnings offers free quotes and consultations to help you make the right choices. Browse the full range of pergolas and veranda structures to find a solution that suits your garden, your budget, and your lifestyle.
FAQ
Do I need planning permission for a veranda in the UK?
Most verandas in England fall under permitted development and do not require planning permission, provided they are single-storey, under 4 metres in height, and cover less than 50% of the surrounding land. Properties in conservation areas or with Article 4 directions are exceptions and always require consent.
What is the best roofing material for a UK veranda?
Polycarbonate is the most affordable and practical option for most UK homeowners, offering good light transmission and weather resistance when installed with correct gasket sealing. Glass gives a premium finish but requires a stronger frame and a larger budget.
How long does a veranda take to build?
A straightforward timber veranda typically takes two to four days for an experienced builder, but the concrete curing period adds at least 48 hours before structural work can continue. Rushing the curing stage is the single most common cause of post movement and alignment problems.
What maintenance does a timber veranda need?
Annual inspections to check fixings, sealant joints, and timber condition are the minimum requirement. Re-applying a UV-resistant exterior stain every two to three years and sealing any cracked joints promptly will extend the structure’s lifespan considerably.
Can I add lighting and sockets to my veranda?
Yes, but all outdoor electrical work must comply with Part P regulations and BS 7671, including RCD protection and appropriate IP ratings. Notifiable electrical work must be registered through a competent person scheme, so use a qualified electrician for any new circuits.
Recommended
Comments